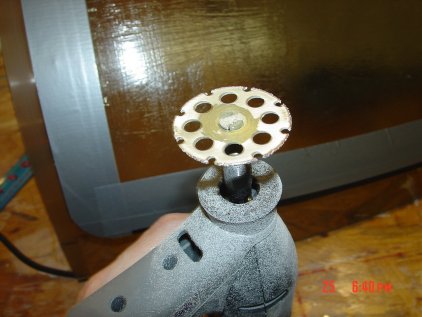
04/01/08 - Purchased Turtleback from Feather Lite. Working
on wings right now.
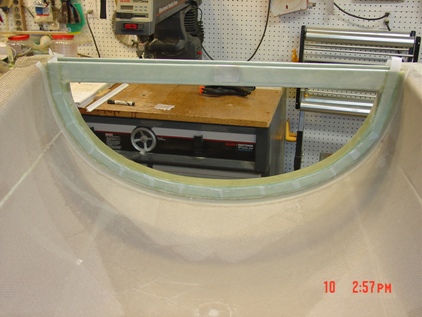
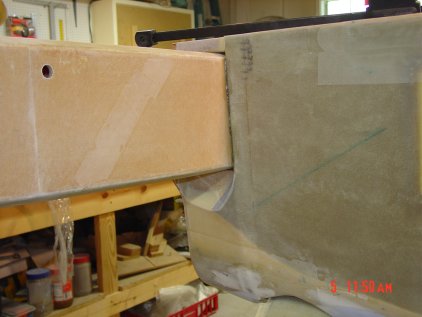
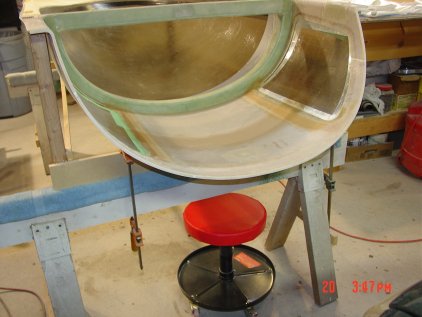
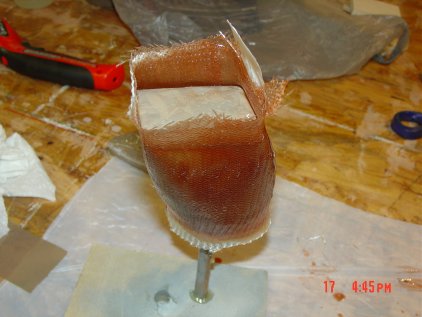
 Test
fit Feather Lite purchased turtleback.
Test
fit Feather Lite purchased turtleback.
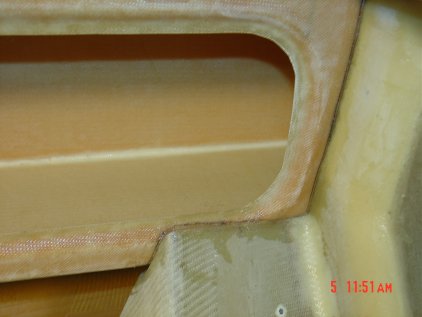
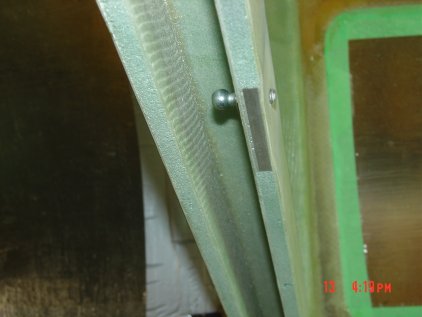
 This
is a change from the plans, I liked
Brian DeFord design and
going to follow his lead. Thanks Brian. You can just see the hard point
where the lift strut will attach used to hold the canopy open, it will be
hidden when closed.
This
is a change from the plans, I liked
Brian DeFord design and
going to follow his lead. Thanks Brian. You can just see the hard point
where the lift strut will attach used to hold the canopy open, it will be
hidden when closed.
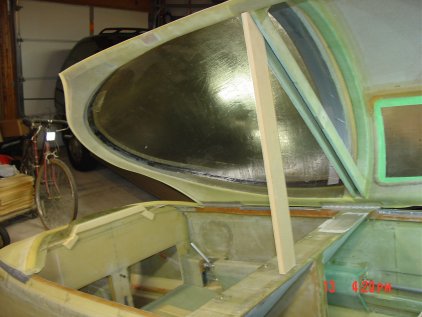
 Windows
and drip rail installation, if I had to do it over again I'd remove all the
inside glass making it recessed all the way around each window. The sticks
are there to hold the windows tight and are covered in packing tape for easy
removal later.
Windows
and drip rail installation, if I had to do it over again I'd remove all the
inside glass making it recessed all the way around each window. The sticks
are there to hold the windows tight and are covered in packing tape for easy
removal later.
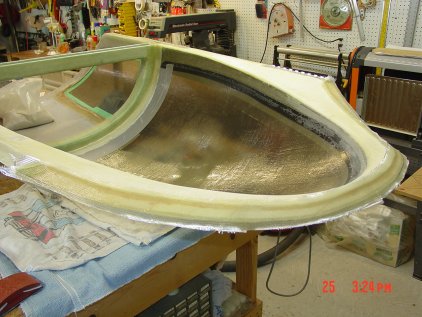
 The
fit on the outside work out just fine and I hope with the finish work still
to come on the inside I will work out a solution for the uneven look on the
inside. As you can see the drip rail is in the wrong location. One thing
about fiberglass you can remove it and go again.
The
fit on the outside work out just fine and I hope with the finish work still
to come on the inside I will work out a solution for the uneven look on the
inside. As you can see the drip rail is in the wrong location. One thing
about fiberglass you can remove it and go again.
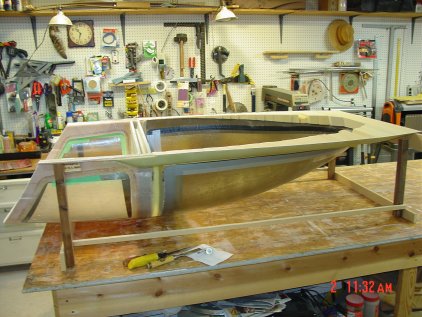
 Working
on the turtleback inside, the drip rail that was installed before the
windows where installed, afterward I found that my measurements where off
and that the rail was 1 1/2" to far back on the sides but okay in the top
center. I thought about the problem and figured that I had not take into
account the thickness of the 1 x 4 I used as a straightedge. So I cut out
the drip rail and relocated it forward so that it bisects the distance
between the two windows on both sides. All is good to go forward, that god
that you can do this, you can't tell it was ever moved.
Working
on the turtleback inside, the drip rail that was installed before the
windows where installed, afterward I found that my measurements where off
and that the rail was 1 1/2" to far back on the sides but okay in the top
center. I thought about the problem and figured that I had not take into
account the thickness of the 1 x 4 I used as a straightedge. So I cut out
the drip rail and relocated it forward so that it bisects the distance
between the two windows on both sides. All is good to go forward, that god
that you can do this, you can't tell it was ever moved.
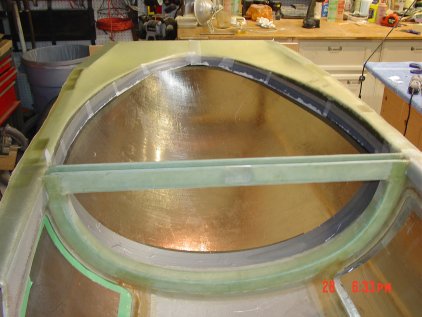
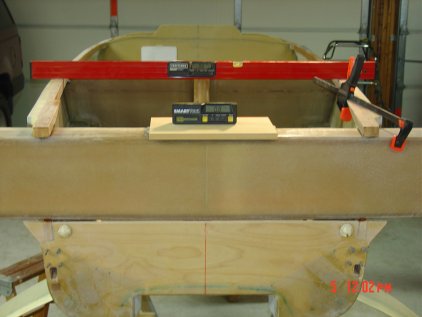 Everything
has been trued up and ready for flox. It works out well that I've got two
digital levels. The red center line is matched with the center line of the
main spar.
Everything
has been trued up and ready for flox. It works out well that I've got two
digital levels. The red center line is matched with the center line of the
main spar.
 Mounting
the main spar in side view, you can see the flox.
Mounting
the main spar in side view, you can see the flox.
 In
this picture you can see the foam I removed to get down to the wood
longerons. The next step is flox and bid glassing all around inside and out.
Use wax paper to wet out the glass, the odd angles and up side down work is
made much easer this way.
In
this picture you can see the foam I removed to get down to the wood
longerons. The next step is flox and bid glassing all around inside and out.
Use wax paper to wet out the glass, the odd angles and up side down work is
made much easer this way.
 Did
things a little different than called for, I floxed and bid taped the upper
firewall in place on the inside and outside on top of the main spar, then
floxed the turtleback to the fuselage and firewall. Why I did this, with the
turtleback out of the way I could work on the complicated bid-flox lay-ups
on the main spar /firewall it is a inside and outside lay-up, you'll have to
see the plans instructions, it came out good and square.
Did
things a little different than called for, I floxed and bid taped the upper
firewall in place on the inside and outside on top of the main spar, then
floxed the turtleback to the fuselage and firewall. Why I did this, with the
turtleback out of the way I could work on the complicated bid-flox lay-ups
on the main spar /firewall it is a inside and outside lay-up, you'll have to
see the plans instructions, it came out good and square.
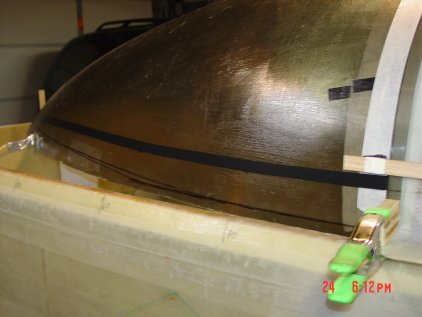
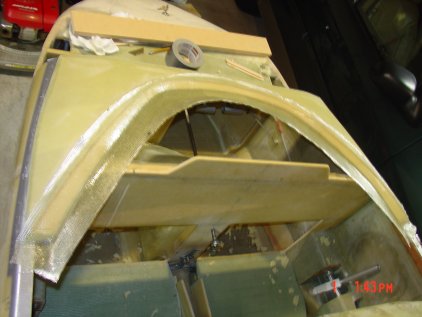
 Here
you can see the turtleback with bid tap and peel ply, the 5 lb sand bag is
there to push down and align the firewall top with the turtleback top.
Here
you can see the turtleback with bid tap and peel ply, the 5 lb sand bag is
there to push down and align the firewall top with the turtleback top.
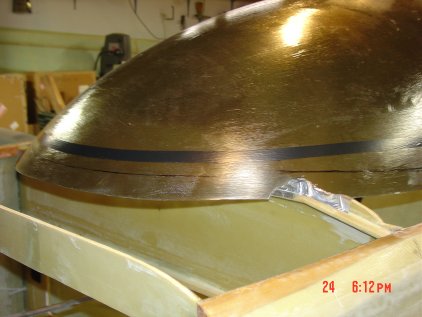
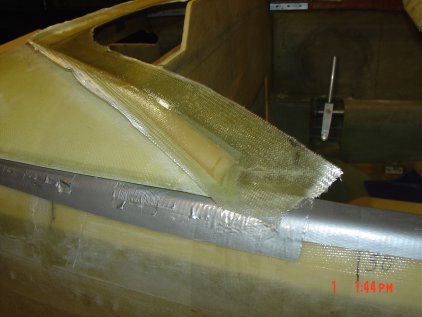
 Turtleback
and firewall bid tap, flox, and foam build up. The red color is because I am
using fast cure
Turtleback
and firewall bid tap, flox, and foam build up. The red color is because I am
using fast cure
 Here
you can see the turtleback bid tape on top of the spar and the glassing
about the engine hard points, the red color epoxy is caused by it being fast
cure type. I've found the small lay-ups don't take long there for the
fast cure is one way of getting several steps done in one day or weekend,
where the slow cure may not let you get to the second step in the same area.
Here
you can see the turtleback bid tape on top of the spar and the glassing
about the engine hard points, the red color epoxy is caused by it being fast
cure type. I've found the small lay-ups don't take long there for the
fast cure is one way of getting several steps done in one day or weekend,
where the slow cure may not let you get to the second step in the same area.
 Turtleback
in floxed in place with the firewall, then comes flox and bid tap all
around.
Turtleback
in floxed in place with the firewall, then comes flox and bid tap all
around.
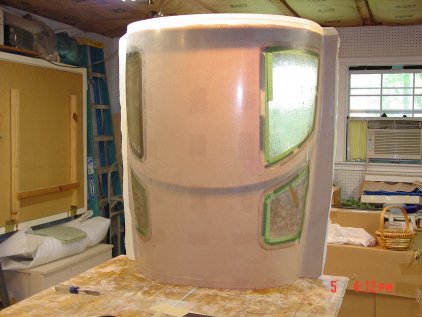
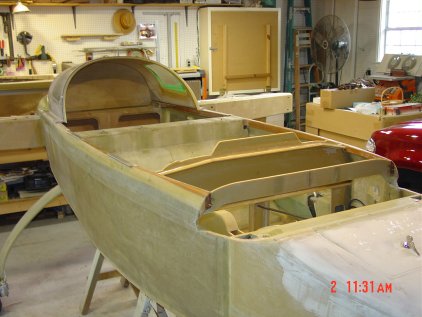
 In
this shot you can see the canopy roll bar and on the sides there is
extra turtleback glass hanging over the edge of the fuselage, this will be
trimmed off later.
In
this shot you can see the canopy roll bar and on the sides there is
extra turtleback glass hanging over the edge of the fuselage, this will be
trimmed off later.
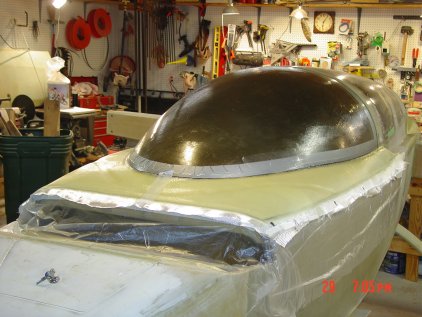
 Time
to set the canopy to the turtle back. The canopy comes over sized from
Todd's Canopies you can see the
tape line where the foam desk will be and the black marker cut line below
that.
Time
to set the canopy to the turtle back. The canopy comes over sized from
Todd's Canopies you can see the
tape line where the foam desk will be and the black marker cut line below
that.
 Here
you can see the cutting of the canopy so the angle is set correctly using
the temples, it is resting on tape and a pencil to create the correct
spacing.
Here
you can see the cutting of the canopy so the angle is set correctly using
the temples, it is resting on tape and a pencil to create the correct
spacing.
 In
the picture you see the cutting wheel I used to trim the canopy, take your
time.
In
the picture you see the cutting wheel I used to trim the canopy, take your
time.
 Canopy
trim with tape set at deck build line. Sand the edge getting ready for
glassing.
Canopy
trim with tape set at deck build line. Sand the edge getting ready for
glassing.
 On
to setting up the decking for the canopy, which will hold the block of foam
the makes up the forward part around the canopy. I use hot glue to hold
supporting blocks in place, you can see once on the back of the seat, I've
found it easer to clean up using a razor knife and a sharp chisel, some just
pops off.
On
to setting up the decking for the canopy, which will hold the block of foam
the makes up the forward part around the canopy. I use hot glue to hold
supporting blocks in place, you can see once on the back of the seat, I've
found it easer to clean up using a razor knife and a sharp chisel, some just
pops off.
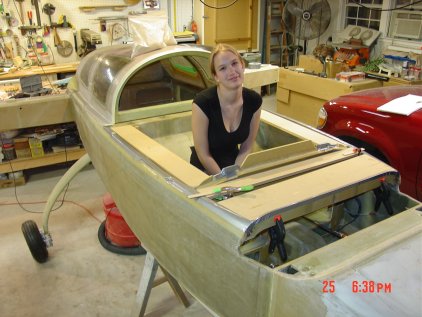 My
daughter Sarah helps me when home from college.
My
daughter Sarah helps me when home from college.
 I
used two 5 lbs sand bags to help the canopy and turtleback to line up.
I
used two 5 lbs sand bags to help the canopy and turtleback to line up.
 Bid
glassed and floxed the canopy onto the turtleback, the plane and the temp
wood desk is covered with cut up garbage bags. It's cheep and works good.
Bid
glassed and floxed the canopy onto the turtleback, the plane and the temp
wood desk is covered with cut up garbage bags. It's cheep and works good.
 Things
line up so well that I didn't need a big head liner. Depending on how
the finishing goes I may extend with paint.
Things
line up so well that I didn't need a big head liner. Depending on how
the finishing goes I may extend with paint.
 Here
you can see the nice smooth transition between the canopy and turtleback.
Here
you can see the nice smooth transition between the canopy and turtleback.
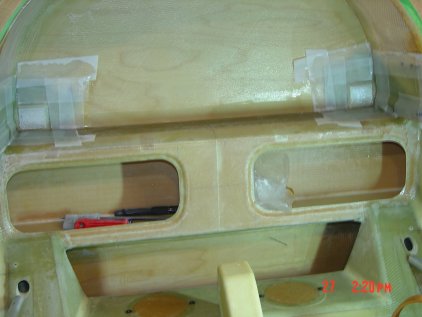
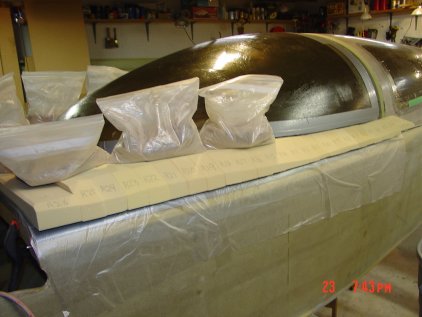 In
these next few shots you can see the blocks of foam that makes up the deck.
I've spent several days fitting the blocks and now they are macro in place. I
used the macro very sparingly I thought. It turned out that I had in some
spots over did it. That did slow down the shaping process for each
line of macro I had to use my dermal tool to grind down the macro lines
between the blocks, but I got there.
In
these next few shots you can see the blocks of foam that makes up the deck.
I've spent several days fitting the blocks and now they are macro in place. I
used the macro very sparingly I thought. It turned out that I had in some
spots over did it. That did slow down the shaping process for each
line of macro I had to use my dermal tool to grind down the macro lines
between the blocks, but I got there.
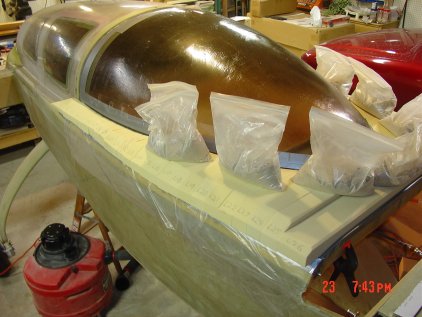 The
sand bags was most likely over kill but I have to make sure everything is
just right. I do enjoy working with the foam, creating all the shapes from
block of foam still amazes me. Fun stuff.
The
sand bags was most likely over kill but I have to make sure everything is
just right. I do enjoy working with the foam, creating all the shapes from
block of foam still amazes me. Fun stuff.
 I
took my time with the shaping of the foam, you can just see that the hinges
are not visible and the indent for the cut line just in front of the canopy.
I made a paper template for each side of the deck out of sheets of paper
taped together. Then I laid them down on top of the glass at the cutting
table marking the edge with "L" and "R" for each side.
I
took my time with the shaping of the foam, you can just see that the hinges
are not visible and the indent for the cut line just in front of the canopy.
I made a paper template for each side of the deck out of sheets of paper
taped together. Then I laid them down on top of the glass at the cutting
table marking the edge with "L" and "R" for each side.
 The
plastic that covers the fuselage are garbage bags cut apart.
The
plastic that covers the fuselage are garbage bags cut apart.
 Cut
free and on the bench, I use hot glue to hold the support frame in place,
it's only temporary and the hot glue pops off clean too.
Cut
free and on the bench, I use hot glue to hold the support frame in place,
it's only temporary and the hot glue pops off clean too.
 Cut
alone the drilled line, it was a slow process but worked out well.
Cut
alone the drilled line, it was a slow process but worked out well.
 Now
that I can get back inside the canopy I completed the engine mounting hard
points and the 8 layers of bid that run up the side of the canopy.
Now
that I can get back inside the canopy I completed the engine mounting hard
points and the 8 layers of bid that run up the side of the canopy.
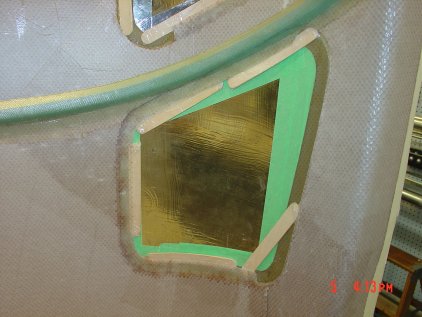
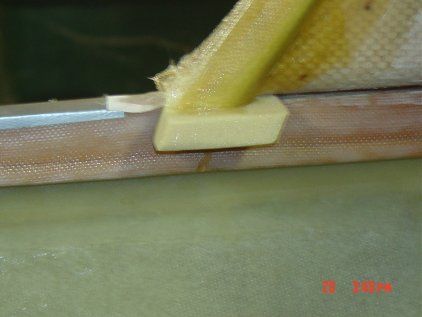
 The
aluminum has one rounded corner to fit better into the corner of the
spar and firewall, the other two side are beveled at a 45deg angle to make
the glass transitions smooth.
The
aluminum has one rounded corner to fit better into the corner of the
spar and firewall, the other two side are beveled at a 45deg angle to make
the glass transitions smooth.
 Moved
the canopy to saw horses to make it easer to dig out and fill with flox the
cut edge.
Moved
the canopy to saw horses to make it easer to dig out and fill with flox the
cut edge.
 The
plans calls for 3/4 thickness foam contour so I put tape on a stick pin and
used it as a depth gage. Worked out nice the foam is soft enough so I could
make depth makes in the foam and sand down to them.
The
plans calls for 3/4 thickness foam contour so I put tape on a stick pin and
used it as a depth gage. Worked out nice the foam is soft enough so I could
make depth makes in the foam and sand down to them.
 Contouring
the inside, adding the hard points for the front canopy that stays over the
IP. On each side you can see the areas where all the foam has been removed,
they will be filled with layers of flox and glass.
Contouring
the inside, adding the hard points for the front canopy that stays over the
IP. On each side you can see the areas where all the foam has been removed,
they will be filled with layers of flox and glass.
 The
hard points are filled with flox and glass layers, the aluminum hard point
are flat and level with the foam. I used the same idea on the inside as I
did on the outside, paper templates used to cut the glass to the correct
shape.
The
hard points are filled with flox and glass layers, the aluminum hard point
are flat and level with the foam. I used the same idea on the inside as I
did on the outside, paper templates used to cut the glass to the correct
shape.
 Cutting
the foam for the drip rail for the canopy area over the IP.
Cutting
the foam for the drip rail for the canopy area over the IP.
 I
used 5 min epoxy to hold down the foam. I've cut through most of the canopy
deck with a few small spots to hold it in place.
I
used 5 min epoxy to hold down the foam. I've cut through most of the canopy
deck with a few small spots to hold it in place.
 Now
I made flox corners and added two bid layers. You can just see the darker
edges of the flox corners. Make sure you open up the cut line enough for the
layers of glass on both sides.
Now
I made flox corners and added two bid layers. You can just see the darker
edges of the flox corners. Make sure you open up the cut line enough for the
layers of glass on both sides.
 Here's
the other half of the cut line on the front part of the canopy, this is why
you need to make sure you open up the cut line to make room for the glass.
Here's
the other half of the cut line on the front part of the canopy, this is why
you need to make sure you open up the cut line to make room for the glass.
 I
will knife trim and sand to it's final shape in a few days after green cure
is about done.
I
will knife trim and sand to it's final shape in a few days after green cure
is about done.
 Working
on the drip rail on the back end. Here you can see the temporary foam block
I use to turn the corner so that what water does make it into the the
rail will be sent back out.
Working
on the drip rail on the back end. Here you can see the temporary foam block
I use to turn the corner so that what water does make it into the the
rail will be sent back out.
 Here
you can see the inside of the rail before knife trim.
Here
you can see the inside of the rail before knife trim.
 Now
that I've got all the rail work done it's time to put the bolts in the
hinges.
Now
that I've got all the rail work done it's time to put the bolts in the
hinges.
 The
nuts are recessed by using a forstner bit that follows the a dowel that I
put in the bolt whole. This makes the counter bore center over the bolt
whole. Once I was happy with how everything lined up and the canopy
operations I floxed them in place.
The
nuts are recessed by using a forstner bit that follows the a dowel that I
put in the bolt whole. This makes the counter bore center over the bolt
whole. Once I was happy with how everything lined up and the canopy
operations I floxed them in place.
 In
this close-up you can see the change from plans, I followed
Brian DeFord design
change. I like the roll bar it protect incase of a roll over and gives a more
open interior. My head resets will be attached to the cross bar.
In
this close-up you can see the change from plans, I followed
Brian DeFord design
change. I like the roll bar it protect incase of a roll over and gives a more
open interior. My head resets will be attached to the cross bar.
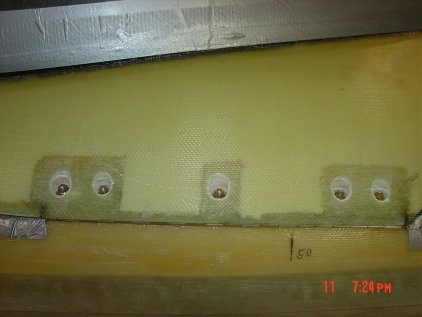
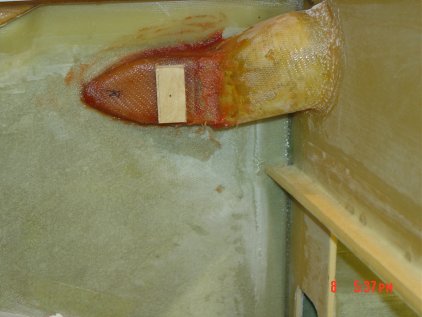
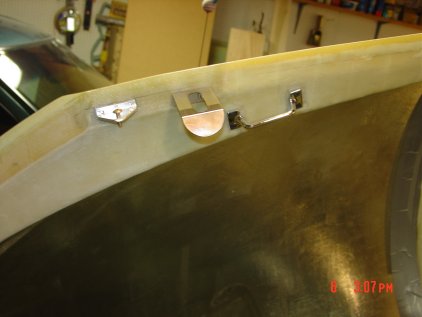
 Hard
point for the gas strut bracket made with aluminum plate, two nut plates all
imbedded into the set back with 3 bid layers. The two white spots you can
see are silicone caulk that keeps the epoxy out of the nut plates.
After cure I used my forstner bit to cut the glass out and then just picked
the silicone plug out clean.
Hard
point for the gas strut bracket made with aluminum plate, two nut plates all
imbedded into the set back with 3 bid layers. The two white spots you can
see are silicone caulk that keeps the epoxy out of the nut plates.
After cure I used my forstner bit to cut the glass out and then just picked
the silicone plug out clean.
Works real nice I've used it on all my install where I need to keep the nut
plates free of epoxy.
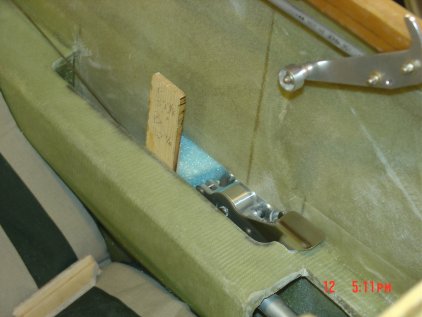
 The
one by three is holding the canopy up until the hard point cures, you can
also see the IP cover is curing too. The foam was hot glued in place and
packing tape put over the form and onto the front deck of the canopy.
The
one by three is holding the canopy up until the hard point cures, you can
also see the IP cover is curing too. The foam was hot glued in place and
packing tape put over the form and onto the front deck of the canopy.
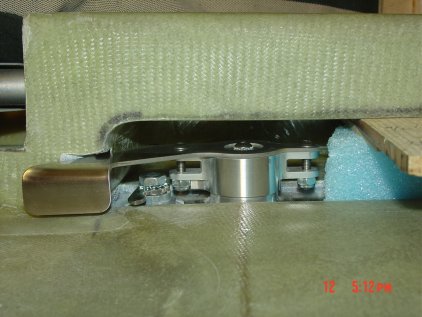
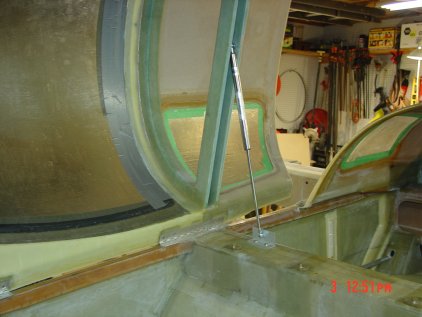 The
gas strut in place testing how will it works. You can see that the bracket
is 2" high, I did that so when the canopy is closed the angle of the strut
goes past level and start pushing down on the canopy to help keep it closed.
During my testing I found that the aluminum bracket was to light weight, so
I've order 6061-T6 this can stand up to the torque when the strut hits the
hard stop or wind gives it a push.
The
gas strut in place testing how will it works. You can see that the bracket
is 2" high, I did that so when the canopy is closed the angle of the strut
goes past level and start pushing down on the canopy to help keep it closed.
During my testing I found that the aluminum bracket was to light weight, so
I've order 6061-T6 this can stand up to the torque when the strut hits the
hard stop or wind gives it a push.
 Here's
the trimmed IP cover still need to add the hold down clips and remove the
remaining foam off the IP.
Here's
the trimmed IP cover still need to add the hold down clips and remove the
remaining foam off the IP.
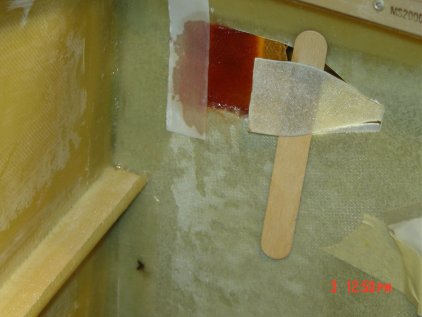
 After
cutting the naca-scoop shape from the plans and removing the inside glass
and foam. I sanded a transition from the outside to the inside and glassed
it. The red color epoxy is the fast cure type. It will cure complete in
about 2 hours. The color fades after cure. The stir stick is there to hold
the outside glass out of the way.
After
cutting the naca-scoop shape from the plans and removing the inside glass
and foam. I sanded a transition from the outside to the inside and glassed
it. The red color epoxy is the fast cure type. It will cure complete in
about 2 hours. The color fades after cure. The stir stick is there to hold
the outside glass out of the way.
 In
the picture you can see the inside with the flox and glass transition in
red.
In
the picture you can see the inside with the flox and glass transition in
red.
 I
created foam forms covering them with packing tape to create the parts for
each sides vent duct work.
I
created foam forms covering them with packing tape to create the parts for
each sides vent duct work.
 In
this picture I've floxed the outside skin into the naca duct work that is
floxed from the inside. The screw was cover with a light film of petroleum
jelly to keep it from bonding with the flox epoxy mix. It is removed once
the flox is cured and sanded smooth.
In
this picture I've floxed the outside skin into the naca duct work that is
floxed from the inside. The screw was cover with a light film of petroleum
jelly to keep it from bonding with the flox epoxy mix. It is removed once
the flox is cured and sanded smooth.
 No
cleco needed here just a screw and block of scrap wood to hold it all
together till cured. You can also see the color change as the epoxy cures,
the older part next to the IP is about a week old, the naca shaped part is
one day old.
No
cleco needed here just a screw and block of scrap wood to hold it all
together till cured. You can also see the color change as the epoxy cures,
the older part next to the IP is about a week old, the naca shaped part is
one day old.
 I
liked the drawer pull that I saw at Home Depot
I
liked the drawer pull that I saw at Home Depot
 I
didn't like the little door in the airplane used to open the canopy. Here
you can see the inside latch location opening.
I
didn't like the little door in the airplane used to open the canopy. Here
you can see the inside latch location opening.
 The
latch is installed and floxed in place, I used a push/pull cable to control
canopy three latches.
The
latch is installed and floxed in place, I used a push/pull cable to control
canopy three latches.
 You
can see that I will lose a little map pocket space as a trade off.
You
can see that I will lose a little map pocket space as a trade off.
 The
flush mount nature of the handle and the lock access made the change from
plans a key point for me.
The
flush mount nature of the handle and the lock access made the change from
plans a key point for me.
 The
latch handle in the open position, it works smooth and clean.
The
latch handle in the open position, it works smooth and clean.
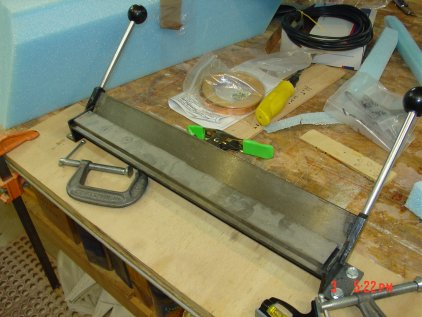 Bench
mount break I used to create the safety catch latch.
Bench
mount break I used to create the safety catch latch.
 Made
out of stainless spring steel
Made
out of stainless spring steel
 Here
you can see canopy in the closed position.
Here
you can see canopy in the closed position.
 The
canopy in the open position
The
canopy in the open position
Still have finish work to complete, not sure what the
interior will be covered with, thinking cloth like head liner, Something
soft and sound proofing.
