Started 12/20/2004 finished 03/13/2005 Hours worked this
chapter. 60.0 hours
 No
power controller, just two
battery charger do the job and cost a lot less. For some time I was thinking
about buying the power transformer but than I thought what would I do with
it after. I can always use battery charges ($39.00 on sale at Sears)
No
power controller, just two
battery charger do the job and cost a lot less. For some time I was thinking
about buying the power transformer but than I thought what would I do with
it after. I can always use battery charges ($39.00 on sale at Sears)
 Here is my hot wire saw. It's easy to handle, made from 1/4 plywood and some
1 X 4 , 2 X 4 about 3 lbs.
Here is my hot wire saw. It's easy to handle, made from 1/4 plywood and some
1 X 4 , 2 X 4 about 3 lbs.
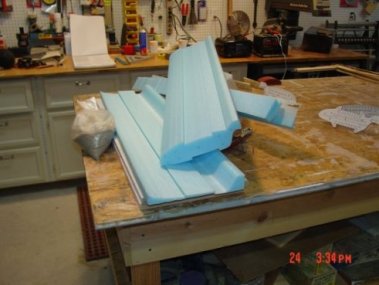
The following are the center canard core. For the first time
it came out good. It was a lot of fun to see the core change from a one
dimensional template to a real 3D wing part.
 One
thing I did do is go over the temples and make
sure the edges are as smooth as I can get them, the hot wire will catch on
the smallest bumps. (Take your time on the templates!!)
One
thing I did do is go over the temples and make
sure the edges are as smooth as I can get them, the hot wire will catch on
the smallest bumps. (Take your time on the templates!!)
 The outboard foam is on back order, should be here in a week.
Once all the cores are hot wired and the leading edge is cut off, you put in the dowel pins as call for, this
will make putting the leading edge back on a snap.
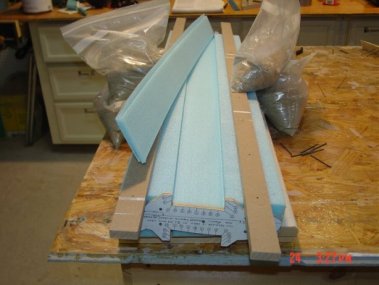
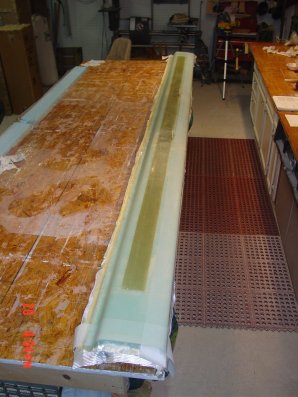
 After the cores are cut
leading edge removed, the three part are epoxy together
then put into the jig you see in this picture.
After the cores are cut
leading edge removed, the three part are epoxy together
then put into the jig you see in this picture.
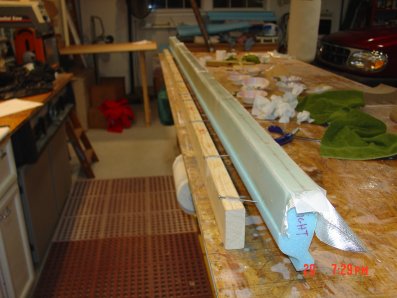
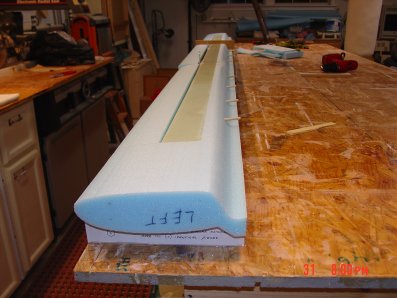
Next is the leading edge set up for the bottom spar cap. You can see the
dowels that hold the parts in their original locations.
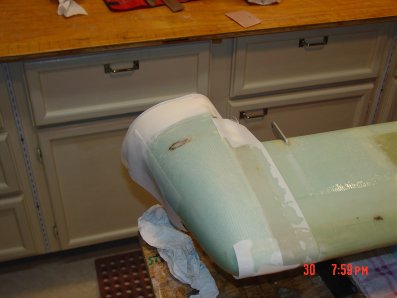
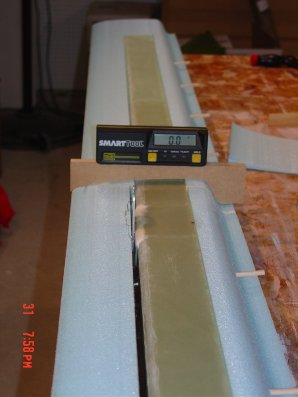 Here you can see the tabs that are used to bolt the canard to the fuselage.
Use the gauge templates often to make sure you've got the canard just right.
NOTES: Make sure that the top and bottom gauge templates come together on
both leading edge and trailing edge. Sand carefully until they do.... don't
forget the thickness of the glass it will make the canard bigger so leave
room for it.
Here you can see the tabs that are used to bolt the canard to the fuselage.
Use the gauge templates often to make sure you've got the canard just right.
NOTES: Make sure that the top and bottom gauge templates come together on
both leading edge and trailing edge. Sand carefully until they do.... don't
forget the thickness of the glass it will make the canard bigger so leave
room for it.
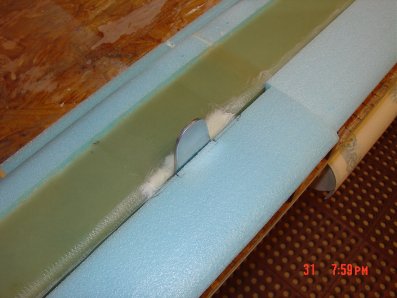
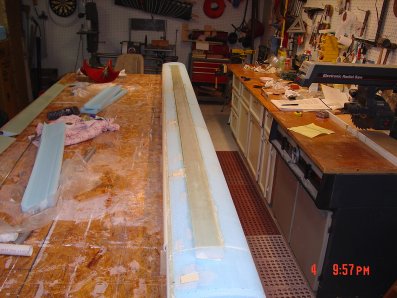
 In
this picture you can see the dowels used to re-align the leading edge with
the rest of the canard.
In
this picture you can see the dowels used to re-align the leading edge with
the rest of the canard.
 Leading edge almost ready to be attached just some foam needs to be removed
at the tab location.
Leading edge almost ready to be attached just some foam needs to be removed
at the tab location.
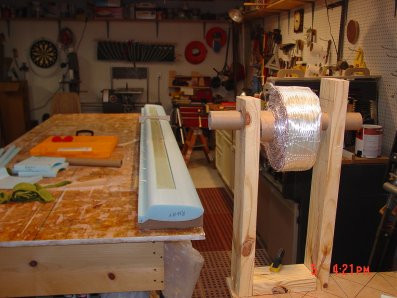
 Here
you see the laser I used the make sure all was lined up correctly before the
bottom spar cap work.
Here
you see the laser I used the make sure all was lined up correctly before the
bottom spar cap work.
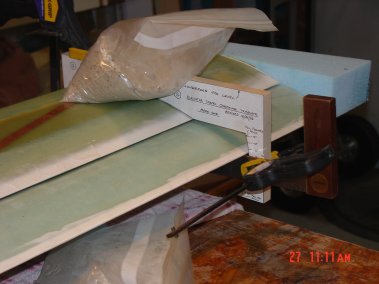
 The
canard spar and leading edge joint are filled with macro and the surface is
smoothed making sure all joints are true and level. Make sure the gauge
templates are used often.
The
canard spar and leading edge joint are filled with macro and the surface is
smoothed making sure all joints are true and level. Make sure the gauge
templates are used often.
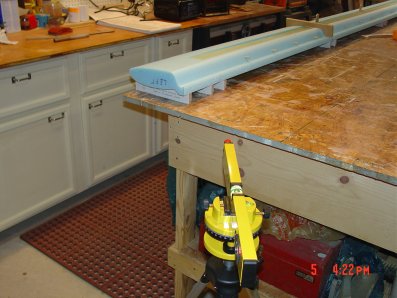
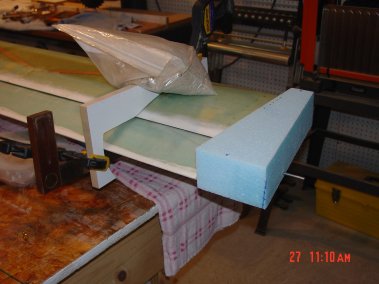
 You can see the spar tap jig I made to help hold it when putting it down on
the canard.
You can see the spar tap jig I made to help hold it when putting it down on
the canard.
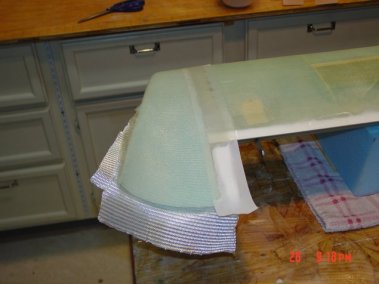
 The canard is covered with cut up garbage bags so that the epoxy goes where
I want and no where else. Bottom spar cap complete.
The canard is covered with cut up garbage bags so that the epoxy goes where
I want and no where else. Bottom spar cap complete.
 Bottom
canard glassed next put the canard on the blocks of wood and PVC pipe to
finish the top spar, hard points, antenna and skin.
Bottom
canard glassed next put the canard on the blocks of wood and PVC pipe to
finish the top spar, hard points, antenna and skin.
 Here
you can see the hinge hard points not yet sanded level. The Fish tail has
been cut off and the canard profile is set to match the template.
Here
you can see the hinge hard points not yet sanded level. The Fish tail has
been cut off and the canard profile is set to match the template.
 This
is a shot of the finished prep top.
This
is a shot of the finished prep top.
 On
the top I've put the GS was 7.5" and the Nav was 22.8". The cable is put
into a channel just big enough but not to big, I wanted the cable to be
pushed into the channel and not pop up during glassing.
On
the top I've put the GS was 7.5" and the Nav was 22.8". The cable is put
into a channel just big enough but not to big, I wanted the cable to be
pushed into the channel and not pop up during glassing.
 Leading
edge glass rolled around onto the bottom skin making for a smooth
transition.
Leading
edge glass rolled around onto the bottom skin making for a smooth
transition.
 At
this end of the canard you can see the sanded 1 inch area where the wing tip
glass will go.
At
this end of the canard you can see the sanded 1 inch area where the wing tip
glass will go.
 Block
of foam macro to the end, elevator hinge pin rod sticking out.
Block
of foam macro to the end, elevator hinge pin rod sticking out.
 Set
zero angle used to a-line the wing tip template.
Set
zero angle used to a-line the wing tip template.
 I
used a wood glue bottle with sand paper sprayed glued to it as a sanding
form
for the curve in the canard wind tip. Also you can see the blue template
line on the foam set at zero elevator angle.
I
used a wood glue bottle with sand paper sprayed glued to it as a sanding
form
for the curve in the canard wind tip. Also you can see the blue template
line on the foam set at zero elevator angle.
 The
top glass was nothing heard to do, the only part was where to stop when
going around the end and heading to the trailing edge.
The
top glass was nothing heard to do, the only part was where to stop when
going around the end and heading to the trailing edge.
 Next
step is to knife trim and sand the bottom contour.
Next
step is to knife trim and sand the bottom contour.
 The
black oval on the tip is where the hinge rod comes through. Here I used a
straw as the liner for the hole.
The
black oval on the tip is where the hinge rod comes through. Here I used a
straw as the liner for the hole.
 The
trailing edge gets a filling of macro, after cure sanding completes the tips.
The
trailing edge gets a filling of macro, after cure sanding completes the tips.
On to Chapter 11
