Cozy Home | Project Status |
Chapter - 4 5 6 7 8 9 10 11 12 13 14 15 16 17 18 19 20 21 22 23 24 25 26
| CHAPTER 18 -CANOPY Turtle Back - Dec. 2002 - Canopy Started April 18, 2003 and Finished around July 1, 2003 | |
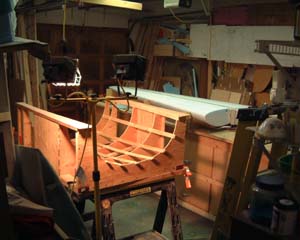 |
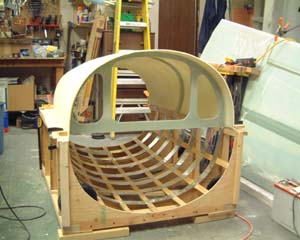
A view of the rear of the canopy jig. I used 3/8" plywood for both the vertical pieces and the 10 strips that run fore and aft. In background on the bench is the wing awaiting peel-ply so it can be glassed on the bottom. |
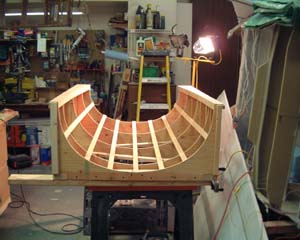 |
Here is a shot at the front end. I didn't find building the jig all that difficult. There are a lot of pieces and it takes a full day to trace the drawings, layout the cuts, do the cutting, and then glue, screw, and nail it all together. To the right of the jig is the right wing - complete except for winglets and some linkage. |
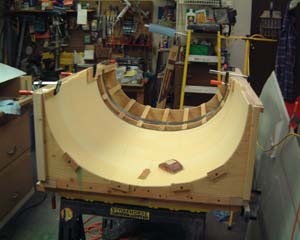 |
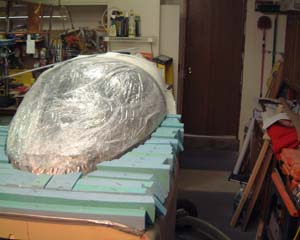
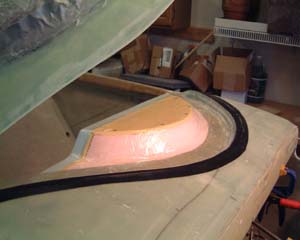
Here foam is in the process of being laid in. I took someone's hind-sight observation and put my seams in the center where it's flatter. Because the length of the foam is too short to make it from one edge to the other in one piece, it's necessary to glue on a 6" piece on the end of the foam. Unfortunately that seam ends up in a position where there is lots of stress and bend and it wants to make an ugly bulge outward. So, I glued on a six inch piece but then cut the whole thing in about half so that six inch pieces went down the relatively flat center. Yes, there were now 2 joints, but because there was little stress there it seemed to have worked well. |
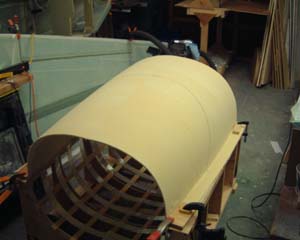 |
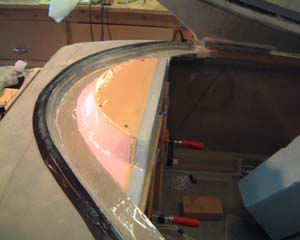
The inside has been layed up and now we're looking at smoothing the outside. I didn't use the 1/2" masking tape on the inside seems to keep micro from seeping out. So I did end up with some micro joints that made smoothing the outside a little challenging. But all-in-all it was still pretty easy and fast to get to a good looking canopy. |
 |
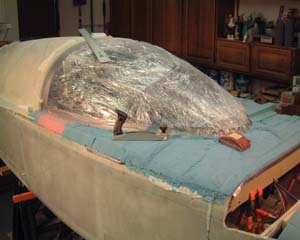
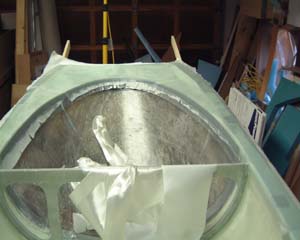
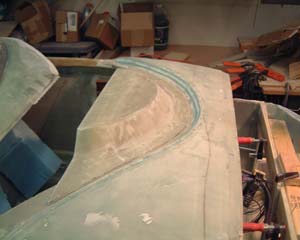
Is this the finished TurtleBack? Is it the "Ecstasy of Victory"? No, unfortunately this is the "Agony of Defeat"? Don't you hate it when you are admiring your finished work and then something just looks wrong and it suddenly dawns on you that you have done something incredibly dumb? Look closely inside the canopy and you see the "Drip Rail" arching up in the center where the future cut-line is (i.e. where the canopy will open. Unfortunately when the canopy was upside down and backwards in the jig - and me having a bad reading day - I slanted the drip rail and thus the cut line the opposite direction. So...(next frame below) |
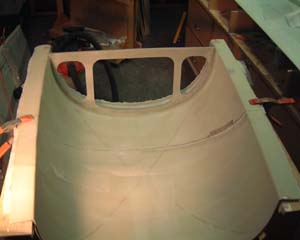 |
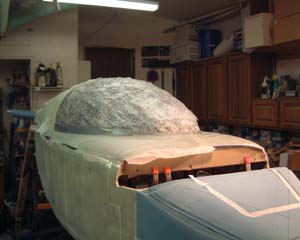
I got to cut the original drip rail off and grind down the fiberglass that was there to hold it on. Then I reinstalled it in the correct position (at least I hope it's in the correct position!!!). Lesson - pay attention and don't get too focused on the measurements that you lose the perspective of where those measurements start and stop. |
 |
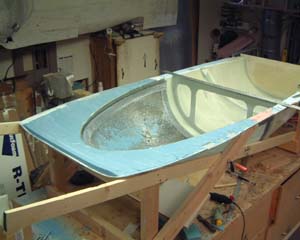
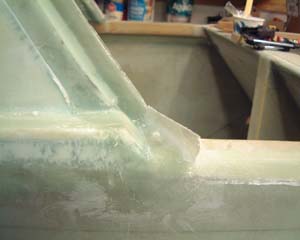
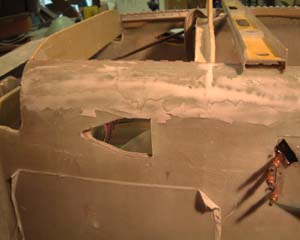
Mounting firewall to canopy - note that since I'm doing this chapter "out of sequence", I don't have the center-spar installed. Since I discovered that my bulkheads - including lower firewall - are not perpendicular with the centerline, I squared the upper firewall by using a straight 8ft board centered perpendicular across the longerons at the firewall. When the distance from each end of the board is the same to the center line at the nose then the board is perpendicular with the centerline. |
 |
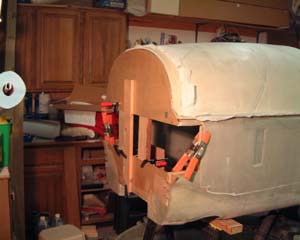
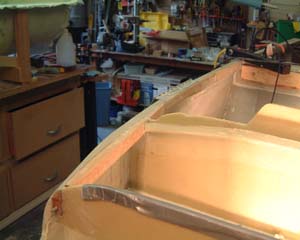
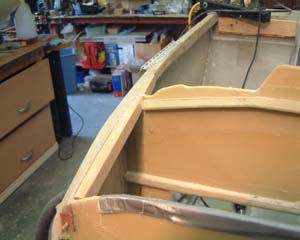
The bubble canopy has been trimmed around the bottom. I bought my canopy from Todd's Canopies Todd's Canopies - 954-579-0874, Website email:BSILVER05@aol.com. It was plenty big - there was lots of timming to do and I had raised the turtleback 1". I've never found bondo to be a reliable way to clamp things. So, at left is the way I found best to provide clamping at different angles on the canopy bubble. The strap across the 2x4 uprights is a couple of bungie cords. |
 |
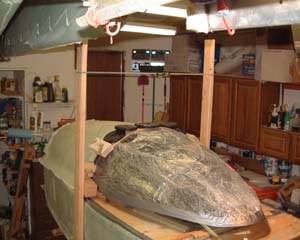
Here are the million and one urethane foam blocks layed out and numbered. Shaping each block to fit under the canopy and more-or-less snug was a tedious job. If I had it to do over again I'd use less micro. When the plans say "just use a dab" at the bottom at at the canopy - that's what you should do. When it comes time to shape the inside even the dab on the bottom will be a pain.... |
 |
Shaping, shaping, shaping... I changed the elevation of the canopy and tape line at the back of the canopy so the templates after FS50 were pretty worthless. I think there is a slight difference between the left and right sides - but unless you make a template from one side and compare it to the other - you're not going to tell the difference (if you can just humor me and tell me you can't!!). |
 |
Outside canopy deck glassed!! |
 |
The inside foam was a mess. There were gouges from the hacksaw (cutting the canopy free from the fuselage) and chunks out from the small dabs of micro. Plus since I had used a lot of micro on the bottom edge there were lots of ridges the cope with in carving the inside. I eventually got it close - and then did lots of fill with micro before doing the inside layup. |
 |
The inside is layed up and ready for the next step - well uh, not quite. Despite having marked the location of the "handle pads" (reinforced points where the handle attaches) at least 3 times, I failed to create the pads prior to doing the layup. I kept saying - "just one more layer of micro and I'll sand that and then do those pads". So, I'll have to cut through the layup to put the pads in and then patch over them - no big deal - just would have been easier if I hadn't forgotten. |
 |
Here I am mounting the rear windows. I don't like drilling any more holes than I need to in my airplane so instead of drilling holes for cliko's on the top of the windows I simply bridged between the two windows with some 1x2's and weighted them down. I did have to use cliko's in the top of the windows to pull them in and hold them in place while the flox set. |
 |
The plans don't have any instructions on how to connect the drip rail to the outside world. I guess that is an "exercise for the reader". I've been to several airshows and seen 4-5 different Cozy's and each builder has done something a little different here. I simply put a cup on the bottom of the channel and then routed it over the longeron. The canopy lip is notched on the aft end to go over the top of this channel. |
 |
I decided to go with the option of making the forward canopy top removable. So, here I have floxed in the wooden support brace to the longeron. |
 |
Another shot of the support brace. I obviously lost interest in taking pictures! But the finished top can be seen in the pictures below during the making of the instrument panel cover. |
 |
The instrument panel cover mold was formed from 2" thick styreneand then 1/4" thick piece of urethane. |
 |
To extend the lip of the instrument panel cover over the aft edge of the instrument panel I bondo'ed a 1" thick piece of blue foam to the instrument panel. |
 |
Here is the finished IP cover and removable canopy top. |
 |
Gotta have air! Here is the hole for the fresh air inlet - "NACA Scoop". |
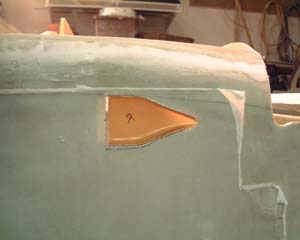 |
And, here is the scoop put in place. I purchased these little scoops from Aerocad. It seemed like a good idea at the time. But they would have been super easy to make myself and the ones from Aerocad are a bit larger than the plans version. |
| Top - Now on to Chapter 16 - Controls (yep I'm building out of sequence). | |