Chapter 25: Hiding the Canopy Hinges
Hiding the Canopy Hinges
My forward hinge sticks out quite a bit from the canopy deck. So I used lots of micro around the forward hinge area to reshape the fuselage and hide the hinge. Remember, we discussed earlier that contouring is shaping, not sanding. And you can use micro to reshape just about anything.
I prepared for this by covering the hinge knuckles with black electrical tape. The tape keeps the micro from curing to and seeping into the hinge knuckles. It's okay for the micro to cure to the knuckles on the upper hinge half, but it must not cure to the knuckles on the lower hinge half. Else, the micro will shatter when you try to open and remove the canopy. Once the micro has cured, a gentle pull on the electrical tape causes the tape to stretch. The tape shrinks just enough so as to be easily pulled from between the hinge and the micro! I also slid a 10-inch piece of transparency film under the hinges to keep the micro piled over the hinges from curing to the micro piled under the hinges. Finally, I applied box sealant tape between the canopy deck and the upper longerons to keep the two from being micro'd together.
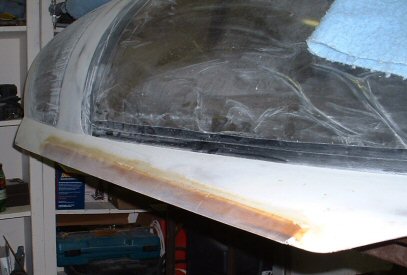
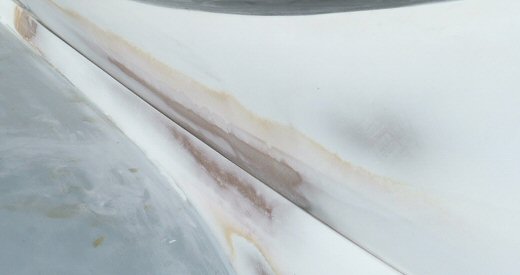
I didn't know how thick I needed the micro to be, so I just overfilled the areas on the canopy, forward deck, and fuselage side to form a good base. I mean I really got obnoxious with the micro. By the time I was done overfilling, the hinges were completely buried in micro. You couldn't even see them! This is a picture I took of the forward hinge after the big fill on just the canopy. See how thick it is? It wasn't nearly that thick when I finished. I also overfilled the areas around the the aft hinge in anticipation of hiding it too.

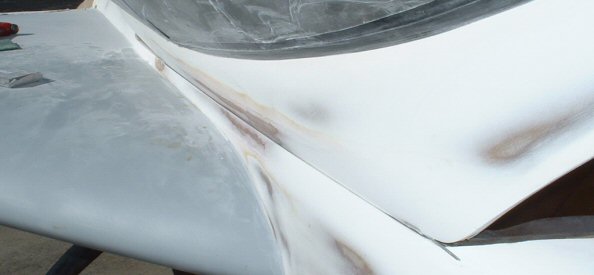
With the hinges buried in micro, I contoured that rounded edge and the cosmetic strake fairing as if the hinges weren't there. I kept contouring the micro until I began to hit the knuckles on the hinges. On my plane, that was only the first and second knuckles on the forward hinge and the last knuckle on the aft hinge. You know the rule, "Stop when you hit the high spots," and a hinge knuckle definitely counts as a high spot! :-)
As it turns out, it didn't take all that much micro to hide the hinges. And I got that graceful, curved edge I was looking for instead of "the bump" you see on some planes. All you see is the first knuckle of the forward hinge and the last knuckle of the aft hinge. However, there's a catch. I ended up having a fair amount of micro over the hinges and on the canopy deck between the hinges. Cracking and chipping will become an issue, especially over the hinges themselves. The hinges flex a little bit when opening and closing the canopy. The rule of thumb is to glass over areas of thick micro, so that's what I did. I first tried a ply of 3-ounce finishing glass, but it didn't stick. It peeled off like peel ply! So I reglassed that area with 2 plies of UNI cut on a 60 degree bias. I also used my normal structural epoxy rather than the WEST. Not that the choice of epoxy had anything to do with the finishing cloth not adhering. Finishing glass is very tightly woven. So I don't think I got enough epoxy saturation into the cloth. Anyway, the 2 plies of UNI adhered great and I'm now happy with the results! The 2 plies of UNI also form that same overlapping lip as the rest of the canopy, so I completed it by glassing another 2 plies of UNI on the underside of the canopy frame and overlapping onto the lip.
Again, because of the way my hinges are installed, they are more inboard of the canopy edge than they should be. Coupled with a nice, generously curved canopy edge, I ended up with quite a bit of impingement between the canopy edge and the outside of the upper longeron. So I carved a "slot" to provide clearance for the canopy edge. Just as I had done on the canopy edge, I glassed 2 plies of UNI to cover the micro that was under and between the hinges. This will prevent the micro from chipping. Once the UNI was cured, I sanded it flush with the top of the longeron. Next, I carved a slot into the micro. (Remember, this is the "cosmetic" micro that is between the 2-UNI covering and the true outer fuselage skin of the upper longeron.) I re-installed the canopy, then opened it inch by inch to determine where the canopy edge would hit. I carved away more micro where needed to remove any impingements. Unfortunately for me, I couldn't get enough clearance in just the cosmetic micro alone. I had to cut a notch into the longeron to get enough clearance. I verified I had ample clearance, then glassed 2-UNI into the slot to gain back some of the strength lost by having to cut through some previous plies while making the notch. The 2-UNI in the slot is also glass-to-glass with the outer covering to strengthen that edge and prevent chipping or peeling. I "fine-tuned" the gap by glassing over the gap and recutting it straight and thin. I applied a thin layer of dry micro and recontoured the coverings to blend in to the rest of the areas around the hinges.

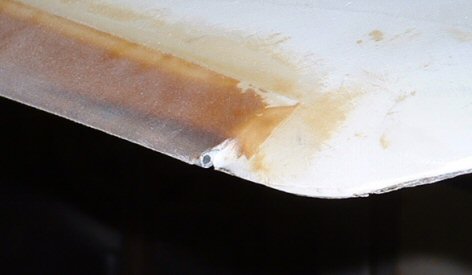
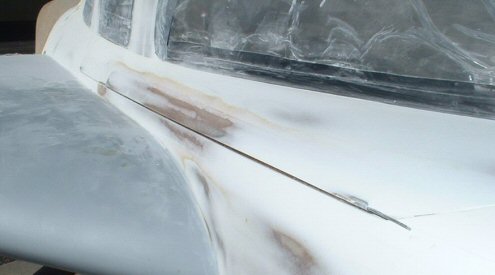
These pictures are of the gap when the fuselage is closed and open. The gap appears wider in these pictures than it does in real life, probably due to the dark epoxy in the slot. It worked. The hinges are hidden completely except for the first and last knuckles.
I'm none too happy with having to do all this, but it's my own fault. It shouldn't have been this hard to cosmetically hide the hinges. As far as I know, no one else has had to make a slot like this. But it's what I had to do, and I think it's going to be okay cosmetically. One day, I'll take the time to write up my diatribe about where I think I went wrong with the hinge installation. The short story is: (1) I should have made the longeron conform more closely to the FJB and FJC jigs in Chapter 5, Step 1. Instead of going for a gentle curve I should have made the longeron more angled. This would have allowed for a straighter longeron section where the hinges would eventually go; and (2) I should have left the hinges on when I cosmetically carved the starboard longeron and later, the canopy deck. It is easier to carve the foam to match where the hinge sticks out than it is to cosmetically hide it with micro in Chapter 25.