Chapter 24: Armrests, Seats, and Fairings

Step 9 - Cosmetic Strake Fairings
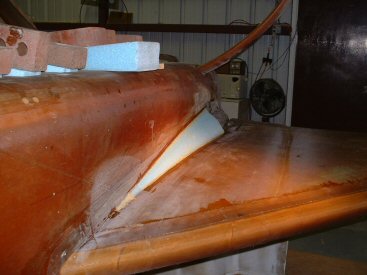
After almost 2,000 hours of construction time, I finally have to admit that me and pour-foam don't get along! I started the fairing construction by pour-foaming the upper and lower cosmetic strake fairings as per the plans, but I was not pleased with the results. It has nothing to do with the pour foam itself. It's me. I'm too aggressive and not patient enough when sanding urethane foam. The fairings came out WAY TOO FLAT and were not very cosmetic at all!
Lower Strake Fairings
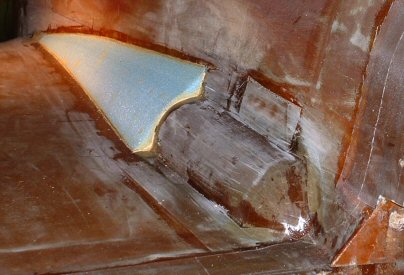
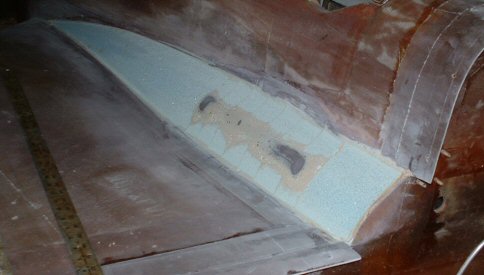
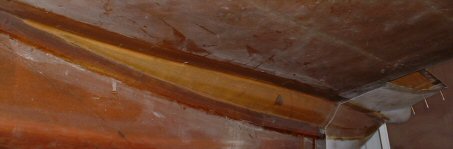
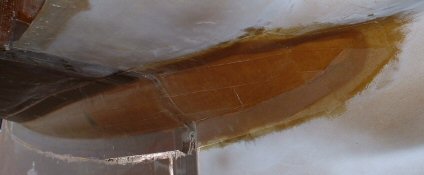
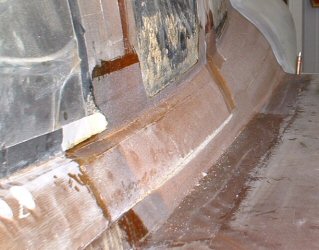
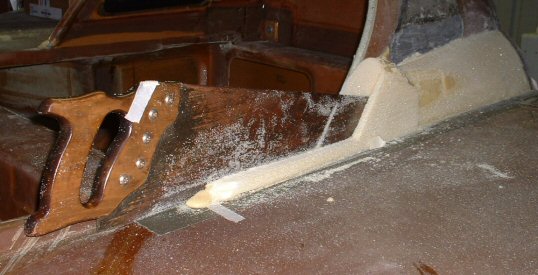
So I yanked all the foam off, rounded up some blue wing foam, and hot-wired the damned fairings like Norm Muzzy did. I should have done this from the start. It was MUCHO faster. The bottom fairings were easy. Using the M drawing of the lower firewall, I drew in the outline of my sump, then drew in a nice, pleasing shape for a fairing that would encompass the sump. I made a hotwire template of that shape and slapped it onto one end of the foam block. Now this will be hard to believe, but I made a notch in one corner of another piece of wood and slapped that one on what would be the pointy end. I used the notched template to hold the wire still at the pointy end while the other end rode along on the curvy template. Surprisingly, the fairings came out perfect with very, very little burning at the pointy end. Although the sides of the fairings were cut with straight edges, the fairings take on beautiful curves when placed against the natural bends formed by the fuselage and strakes. You can see in the pictures below that I cut each bottom fairing into two pieces to facilitate the fitting. The forward parts was easy. For the parts that fit over the sump blisters, I cut those piece into slices and individually carved and shaped each slice to fit before microing in place. The dark spots are the sump blisters just peeking through.
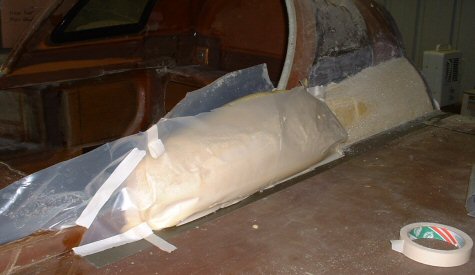
I noticed that I seem to have a problem with my sump blisters. Even though I made them slightly smaller than plans, there is no freakin' way the fairing aft of the sumps will meet the plans firewall dimensions without a very abrupt change. This is probably because I didn't use the Featherlite sump blisters, which are sort of shaped like a wedge of lemon. Not at all like specified in the plans. Go figure! Anyway, I'm going to extend the cosmetic fairings past the firewall and onto the lower cowl to retain smooth, attached air flow. If you look closely at the third picture, you can see an extra piece of plywood glassed in place to extend the cosmetic pieces on the firewall. To make the cowl fairings, I taped some plastic "socks" onto the bottom cowl, stood it on its end, and poured in the pour-foam. But a funny thing happened. Shortly after taking this picture, I picked up the cowl to saw off the excess pour-foam. BOTH pour-foamed fairings fell off the cowl! I have absolutely no idea why the pour foam did not stick. I thought pour foam stuck to everything? :-) So what I did was glue them in place with a few dabs of bondo. The cowl foam is only there as a form. I'll remove the foam once I've glassed the fairing in place.
Upper Strake Fairings -- My Way!
This worked so good that I went back and yanked out the pour foam on the upper fairings too! It took a little more work to create the hotwire templates since the blue foam has to fit the zig and zag of the top longerons, strake, and canopy ledges. But in no time at all I had beautiful fairings micro'd in place. I did find it mucho harder to create hotwire templates for the part of fairings that cover the side edges of the canopy. So I pour-foamed those and delicately sanded them into shape, using the hot-wired fairings as guides.

Upper Strake Fairings -- The Previous Way!
As I said, my first attempt at constructing the upper strake fairings was with pour-foam. I decided to leave this text on the web page for others who are far better at shaping urethane foam than I am. Maybe you can find some use from it. :-)
Pour-foaming the cosmetic strake fairings is fairly straight forward. Per the plans, you build a dam and pour-foam the turtledeck and the canopy at the same time. Once cured, you shape the foam, glass the fairing with 2-BID, and cut through the fairing to release the canopy. I questioned, "Why do the cut AFTER glassing the fairing?" In my feeble mind, it looked much easier to make the cut line as you are pour-foaming the fairings. You still have the advantage of carving the entire fairing as a single piece, just without the hassle of screwing up the cut line. Here was my method. I know it works better than the plans (because I did it....twice!) :-)
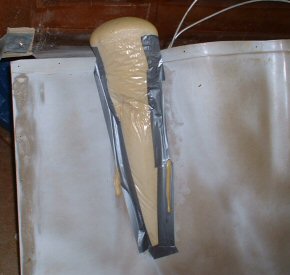
(1) The very first thing I did was to ensure, ensure, ensure the windows were properly covered (protected). You WILL, WILL, WILL GET POUR-FOAM on the windows. You DO NOT WANT to scratch your windows trying to remove excess pour-foam, or when carving the fairings into shape. So do yourself a favor and add a few more layers of tape if need be.
(2) The second thing I did was take a long straight-edge and a sharpie pen to mark an outline of where I wanted the fairing to go. I placed a strip of duct tape on the strake top outboard of the outline. You will be eventually sliding your spline sander fore and aft across the strake top as you shape the fairings. The duct tape prevents the strake tops from getting chewed up. You can see the duct tape in the picture below. I like to whack away most of the excess pour-foam after each pour. The turtleback portion of the fairing is only roughed out in this picture. (I had nothing better to do while waiting for the pour on the port side to cure!) It is nowhere near final shape. I removed the canopy from the plane and placed it on my work bench.
(3) I retrieved a plank from the wood pile for the "dam" and wrapped it in 4-mil plastic sheet. The plastic will keep the pour-foam from sticking to the board. I placed the dam on the strake just outside of the reference marks. At the aft end, I taped the plastic to the cowl lip to prevent the pour-foam from overflowing and making a mess. At the forward end, I untaped the plastic from the top of the dam board and loosely draped it onto the turtleback. I taped the draped plastic onto the drip rail and onto the upper longerons. When working with pour-foam, it is always better to make small pours rather than large pours! Depending on how the batches rise and cure, you will most likely end up with peaks and valleys. The picture below shows how I use plastic to build dams here and there to fill the valleys. This is an example of how I pour-foamed the area outboard of the top longerons forward of the turtleback. The plastic contains the pour to a localized area, but is flexible enough to allow the room for the foam to expand.

(4) After several pours and cure cycles, I took a cross-cut saw, hack-saw blade, and a guinsu knife and whacked away most of the excess foam. I made no attempt to try and shape the fairing at this time. (You need the canopy in place to do this.) I took my 4-foot sanding spline and sanded side-to-side across the top of the longerons, thus sanding the pour-foam on the strake tops into nice, flat, horizontal surfaces. These surfaces form the horizontal surfaces for the cut line. I then spline-sanded side-to-side across the turtleback's canopy lip, creating the nice, flat, vertical surfaces that form the vertical surfaces for the rest of the cut line.

(6) I placed the canopy on a flat surface, covered a plank with plastic, and set about creating the dams as you see in the pictures below. Believe it or not, this all worked extremely well. And with some judicious whacking to knock off the big pieces and some in-the-ballpark sanding, I placed the canopy back onto the airplane and latched it down tight. From there, it was a simple matter to finish carving and shaping the upper strake fairings. I cannot express enough how well this all worked (except that I think the hot-wired blue foam fairings are even better)! My cut lines in the fairings are clean, precise, and flat. I couldn't be more pleased.

(7) I unlatched the canopy, pulled out the canopy hinge pins, and very carefully lifted the canopy straight up from the plane. I glassed 2-BID on the turtleback and on the canopy as per plans.