Chapter 24: Canard Cover

Step 8 - Canard Cover
I made the canard cover as part of Chapter 18 when I carved the nose, canard cover, and canopy deck all at the same time. So shaping the canard cover is a reversal of the plans. Instead of carving the outer shape to match the shape of the nose cover and canopy deck, I had to shape the canard cover foam to match the canard. To do this I pulled the canard cover off the plane and temporarily put the canard in place on the fuselage. I placed a mark on the fuselage side to note the position of the canard's trailing edge. I then removed the canard and put the canard cover back in place.
I took the canard hot wire templates and held them against the fuselage and the side of the canard cover in roughly the same location as where the canard would be. I used the top of the F22, the canard cut-out of the fuselage sides, and the trailing edge reference mark as guides. Eyeballing the templates from each side, I used a sharpie marker and transposed an outline of the templates onto the canard cover. I once again removed the canard cover and this time bolted the canard in place.
From then on, what happened was a steady iteration process of cutting away some of the skin on the sides of the canard cover and sanding away the foam between the cutouts. I wrapped a sheet of 36 grit sandpaper around one of the 3-foot cardboard dowels that our fiberglass cloth is rolled up on. With the cover upside down on the floor, I used the dowel as a spline sander to sand, sand, sand away the interior foam until the dowel contacted the cutouts. Then I'd check the fit of the cover onto the canard, re-mark the cut-outs again, and spline sand some more. All the while slowly sneaking up to the perfect fit.
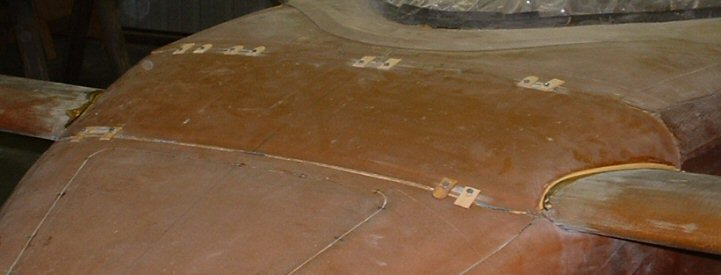
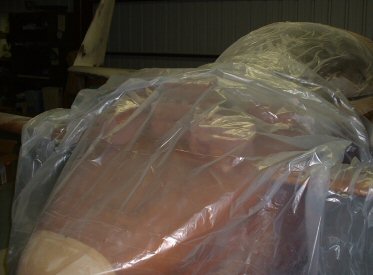
Once I had the proper fit, it was time to micro the cover in place. I knew I was going to weight the cover down with bricks to help with the micro squeeze. I added little wooden tabs to the cover in a few places so the cover would stop sagging when it conformed perfectly to the shapes of the nose top and the forward canopy deck. I stacked the bricks on the cover so the micro would spread out. I put my heater inside the plane, closed the canopy, and threw some plastic over the canard cover so the micro would cure overnight.
The wooden tabs and the bricks really did their jobs! After cure, the canard cover matched perfectly to the nose top and canopy deck.
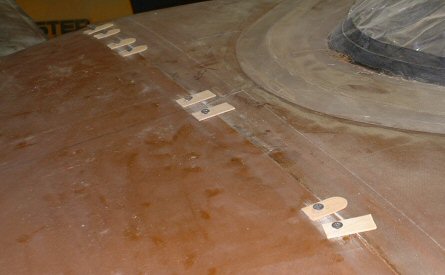

The final steps were closing out the exposed foam. The plans are not very specific on just how to shape the foam. It really doesn't matter much except to ensure there is ample room to get the canard on and off the fuselage. I carved the forward foam from a line off the leading edge to a point 3/4th-inch aft of the start of the canopy lip. I carved the aft foam so the entire surface waas recessed by a half inch. Basically from a line 1/2-inch forward of the canard trailing edge to 1/2-inch forward of the aft edge of the canopy cover. When glassing things like this, I love to make a paper template first, then wet out the glass on my workbench, then transfer the layup to the piece being glassed. It's faster and easier. I can control the epoxy amount and I waste less materials. It's mucho easier to squeegee the layup on the workbench than it is to squeegee it when it's on the piece. The first picture shows the outlines of the paper templates being transferred to the layup. In this case, this is the layup to close out the forward foam on the canard cover. I usually mark out the centerlines, edges, and folds so I know where to position the layup on the piece being glassed. The second picture shows the layup in place on the piece. You can see how I've used the reference marks to position the layup onto the piece. I usually leave the top piece of plastic on the layup to aid in stippling the layup to the piece. This helps to "stick" the layup to the piece and to remove a large majority of the air bubbles. The plastic helps keep the glass from moving around and going crooked on you. I then peel the plastic away and use gentle stippling to remove any remaining air bubbles. Notice in the second picture that the layup is still wavy along the curvy sections of the canopy lip. This is a natural occurrence since the plastic doesn't like to conform to curves like this. So what I do is stick down all the flat surfaces first, then stick the curvy parts every 2 or 3 inches. After peeling the plastic off, it's really easy to stick the rest of the curvy sections in place.

