Chapter 25: Winglets
I started with the winglets first. I wanted to contour them before cutting out the rudders to ensure I got an accurate airfoil shape. If you walk down the EZ flight line and run your hand across the winglets, you'll find that a lot of them are not shaped correctly. They are actually concaved (dished out) in the area immediately aft of those 9-ply layups. I've depicted this is the very exaggerated diagram below. If you think about this for a second you can understand why this happens. The foam cores start out as being perfectly shaped. But then we go and add these thick, 9-ply layups that essentially form large humps on each side of the winglets. The areas aft of the 9-ply layups are concaved by default. (Take a straight edge and span it across from the 9-ply layups to the trailing edge of the rudder and you'll see that the straight edge won't touch any of the surface aft of the "hump".)

The problem is compounded when the rudder and winglet are contoured separately. With the rudder off the plane, builders end up contouring a nice shape from the winglet leading edge to the rudder cut line. The rudder gets contoured kind of flat by default. And when the two are joined back together you get the resulting dish.
To achieve the best airfoil shape possible, we really need to have the rudder attached to the winglet so we can entirely fill the concaved area with micro and reshape the airfoil. The old gurus will tell you, "Contouring is shaping!" And when contouring any winged surface, you get the best shape by methodically sanding across the wing at alternating 45-degree angles from leading edge to trailing edge, from trailing edge to leading edge. How can you get good shaping on the winglets if the rudders are already cut out? You can certainly re-attach the rudders, but how do you keep the rudders from moving while sanding? So I found it significantly easier to contour the winglets before cutting out the rudders.
Inspections and Repairs
(No repairs needed.)
Surface Preparation
I did not peel-ply the winglets. After struggling to sand them by hand, I resorted to sandblasting with great results.
Pre-Filling
In my opinion, the winglets are the some of the hardest parts on the plane to pre-fill. The low areas ahead of, above, and aft of the 9-ply layups are deceptively deep. I had read George's article and I was aware of the need to pre-fill. But I ignored the advice and went directly to Big Filling. That was a big mistake as you'll read below. It would have been extremely helpful had I prefilled the areas mentioned.
Big Filling
I was sure I could master the filling technique right off the bat. Boy was I wrong! My first try at piling on the micro came out a little ugly. The micro looked more like a paper mache' sculpture built by a 4th grader! The micro surface was lumpy and not at all smooth. It quickly became clear that spreading micro is an acquired talent learned over time. You're not born with it. (I had not yet perfected the art of smoothing the micro with a heat gun and trowel.)
Heeding the prime directive, I piled the micro on thick. Maybe too thick! Did I say too thick? Wrong!! After contouring for about an hour I was utterly dismayed to find low spots on each side of the winglet. Damned! I violated the Prime Directive on the very first try! So I wound up going back and filling all the low spots. I also re-applied a thin layer of micro over the entire winglet, and tried again. This time with much more success.
All I can say is, the big fill on the winglets would have gone much easier if I had prefilled them first.
Contouring
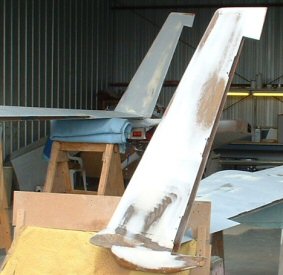
The hardest part about contouring the winglets is holding the wing still. The winglet acts like a long lever arm that tends to rock the wing up and down. I hauled a desk outside, screwed the bottom half of the J5 wing jig to the desk, and used the upper half like a clamp to keep the winglet from wobbling. The other end of the wing is resting on the J2 jig and saw horse. The weight of the desk and its width were tremendously helpful. You can use a saw horse, but it's got to be sturdy. It helps to place a long beam on the ground and clamp it to the legs of the saw horse.
I started out using the home-made sanding boards that George mentions in his article. I also borrowed my hangarmate's sanding bar made from C-channel aluminum and strips of Perma-Grit sanding strips. But I later bought professional fairing boards and Durablocks.
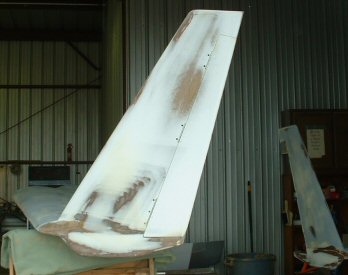
Here are two pictures showing the end results after sanding through the 36 and 80 , and 120 grit schedule. (I started out by sanding through to 120 grit, but now only sand to 80 grit.) Just as you would expect, the high spots occur at the 9-ply layups, the tips, and the leading and trailing edges. Examining these pictures more closely, I probably removed too much micro off the outside surface. I can tell you I carried the 36 grit too far. I just didn't expect that the 80 and 120 grits would be capable of taking off much material, so I mistakenly kept sanding the 36 grit until I got really close to the high spots. Boy was I wrong! The 80 grit is very effective at taking off the peaks left by the 36 grit (as is the 120 grit with the 80 grit). After learning this, I stopped the 36 grit a little bit earlier on the inboard surface and achieved better results. I found it hard to STOP SANDING. It was VERY TEMPTING to want to tweak the surface past the high spots and remove more of the micro. It was hard to say "good enough" and walk away. You just have to trust that the alternating 45-degree sanding motions are correctly contouring the surfaces.
Skim-Coating
I applied two skim coats to fill the pin holes and moon craters in the winglets. I mixed in some cabosil to thicken the epoxy just bit so it wouldn't run on the vertical surfaces. I sanded off enough micro that alot of the glass was exposed. So doing the skim coats helped to coat the glass and protect it.
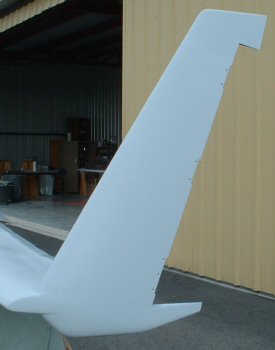
Priming
I primed the winglets and wings at the same time. I had about 20-30 pinholes to fill in each wing, all in areas where I purposely sanded through the skim coats and into the micro. The sacrificial primer is on the left (the wing is inverted) and the final primer is on the right. If the saying is "micro hides a myriad of sins," then the corollary must be that "primer hides a myriad of small sins." I'm extremely pleased with the final results. The wings will stay in their final primer for the next year. I'm going to wait to paint the wings until all the other parts of the plane are in primer. I'll wet sand the primer to 320 grit just before I'm ready to paint the plane. I've moved my wings and stored them in another hangar to prevent them from getting banged up (hangar rash).

[Previous] [Home][Next]