Chapter 18: Installing the Canopy Glass
Step 10: Installing the Canopy Glass
I ordered the canopy and windows from Jeff and Becky at Airplane Plastics. They are wonderful folks to work with. I got the "Medium Smoke 2514" tinting that most of the Cozy IV guys are getting. It's the FAA's max allowable tint (not that it matters to experimentals). Don't worry though, in my opinion the tinting is not anywhere near "dark". It should be called "only slightly dark". It's certainly light enough for night flying. So if you're looking for "dark" as in trying to keep the sun out, go for something alot darker. Jeff made my canopy glass with a larger circumference to fit around my wider and higher turtleback. If you’ve changed your turtleback dimensions in any way, it helps to tell Jeff about that when ordering.
I followed the plans and jigged the canopy in place with the turtleback sitting on the airplane. I raised the front end of the turtleback by another ¾ inches (1.75 inches total) to try and get rid of as much of the depression as possible where the glass meets the top of the turtleback.
I used the nose profile templates and the BL-0 template to correctly locate the forward point of the canopy glass. This is easy enough to do by simply transferring the BL-0 distance behind F28 onto the nose profile templates, then sliding a 4-foot bar along the nose profile template until it first touches the canopy glass. This method makes it fairly easy and painless to determine how much acrylic material to remove from over the instrument panel. Without trimming any acrylic at the IP, the forward location of the nose will be well forward of where it's supposed to be. So I just kept removing acrylic in small chunks (1/8th - 1/4 inch), lowering the nose until the intersection point moved aft enough to match the BL-0 distance. I trimmed about 1.25 inches of acrylic directly over the instrument panel. I didn't have to trim any at the shoulder support because I had raised the turtleback.
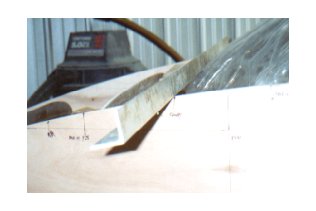
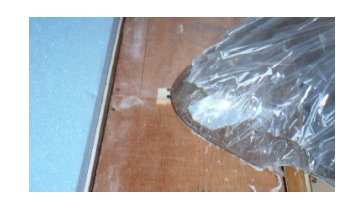
I used a shim and drywall screws to locate the nose of the canopy glass. You may notice the long strip of wood crossways to the fuselage under the canopy glass. I was by myself that day and I used this strip to help place the rear edge of the canopy glass into place on the turtleback flange. It’s hard to see in the picture, but I placed two small blocks about 2 inches outboard of turtleback sides and temporarily clamped the canopy glass to the blocks. This helps spread the glass apart while you set the glass onto the turtleback flange. With one hand supporting the canopy nose and one hand supporting the strip, I was able to negotiate the nose into position, then lower the canopy glass over the turtleback flange and onto the flox bead without smearing the flox. Once I center the canopy glass onto the turtleback, I weighted the top, released the clamps, and held the sides into place with the shims.