Chapter 9: Main Gear Intersection Fairings
(Intersection Fairings are not addressed in the plans.)
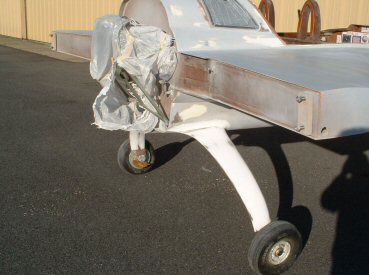
Since the gear legs move relative to the fuselage, we must leave a space between the top of the gear leg and the fuselage sides. Builders often make fairings to cosmetically cover the hole and to gain that last nano-knot of speed. There are three ways I know of to handle the intersection fairings:
(a) Cuffs -- Attach the fairings to the fuselage and allow the gear leg to float (or slide) inside the cuff.
(b) Floaters -- Attach the fairings to the gear legs, allowing for a gap between the fuselage skin and the inboard edge of the fairings. In this manner the fairing moves when the gear leg moves. The gap between the fairing flanges and the fuselage is wide enough to not scratch the paint as the legs flex upward on landing.
(c) Splitters -- The fairing is split fore to aft with the inside half being glassed to the fuselage and the outer half being glassed to the gear leg. In this manner, the inside half remains stationary and the outer half moves with the gear leg. The fairing halves won't be aligned when the plane's on the ground due to the weight on the gear. But they do align perfectly in flight (no weigh on gear).
I opted for splitters because that seemed to be the method being used the most by active flyers in the Cozy and Canard Aviator e-mail groups.
Approach
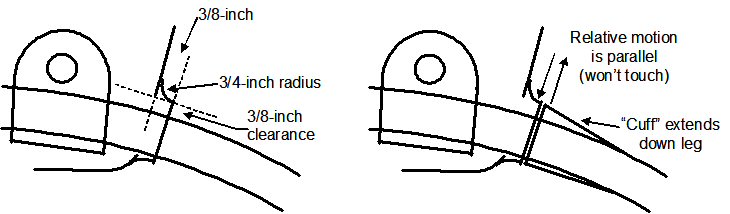
For the splitters to work properly, you must follow two rules. First, the slit must be located on a section of the fairing that is at least as thick as the clearance needed. If you want a 3/8th-inch clearance, then any fillet must be made 3/8-inches or more above the top of the gear leg. I'm going with 3/8th inches of clearance because some Cozy IV flyers have noted their fuselages getting crushed by that amount in hard, aircraft carrier landings. Second, for the fairing halves to miss each other, the slit needs to be in the same direction as the gear leg movement. 99.9% of the gear leg motion is perpendicular to the leg (because the fuselage intersection is close to the mounting tabs and main gear bolt). Therefore, the slit needs to be perpendicular to the gear leg.
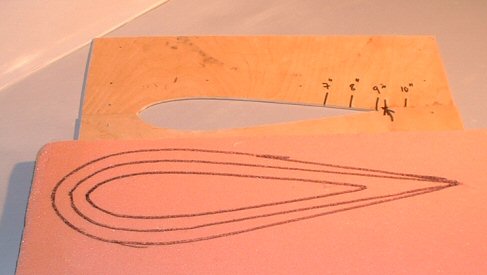
Step 1
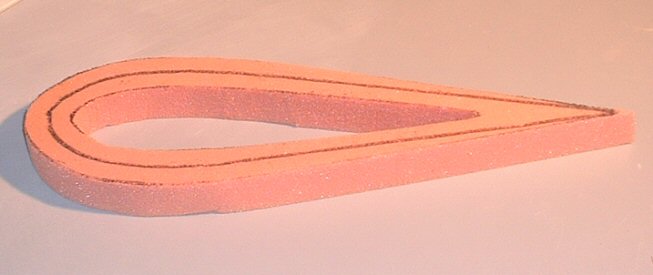
I decided to make the inboard fairing from a single piece of foam, followed by an outboard "cuff" from separate pieces of foam. The inboard foam would "set" the clearance I needed. By "pre-carving" the fairing on the workbench, I can ensure that I'll maintain the needed clearances for the inboard half of the fairing. The outboard cuff is purely cosmetic to give me a gentle taper from slit to the rest of the gear leg.

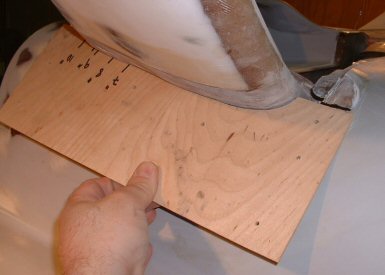
I used the same airfoil templates for making the gear leg fairings and marked the fuselage with the centerlines for positioning the intersection fairing. I cut and carved the inboard fairing foam, slid it onto the gear leg, then tacked the upper half of the fairing foam against the the fuselage with dabs of 5-minute glue. At this point, the bottom half won't even touch the section of the fuselage under the gear. Remember, the foam is flat. The fuselage is rounded! After the glue set, I cut the bottom half of the fairing from the top half and fitted it into place against the fuselage and main gear cover. Why didn't I just cut the foam in half to begin with? Because I wanted the top half of the foam to be glued perpendicular to the gear leg. The top half determines where the slit will be placed. Since the slit needs to be perpendicular to the gear leg, having the complete "doughnut" on the gear helps hold the fairing foam perpendicular to the gear leg while the glue sets up. BTW, I cheated a bit and made the pink foam to be 1/2-inch thick. I'm a little ham-fisted when it comes to shaping foam. So, the 1/2-inch foam gave me an extra 1/8th-inch to play with.
Step 2
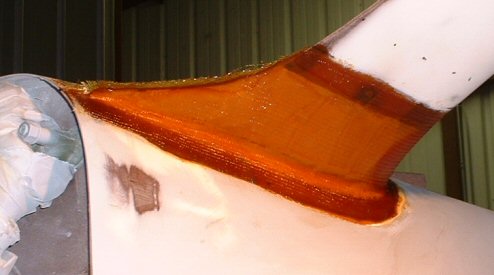
I cut out the cuffs from urethane foam. I'd need two web pages to explain how I did that. Those details will just have to wait. Not all the pieces fit perfectly, so I used some Great Stuff foam to fill the voids. After the Great Stuff pour-foam cured (24-hour cure), I carefully sanded and shaped the cuffs to match the inboard foam. Much of the bottom cuff on the underside of the gear leg gets sanded away. Mine looked really ugly because (1) most of it gets sanded off because it doesn't need to be as thick as the top side; and (2) the cuff was glued down with dots of glue. Some of it got thin enough to break off. No matter. It all got covered with 2 plies of BID.

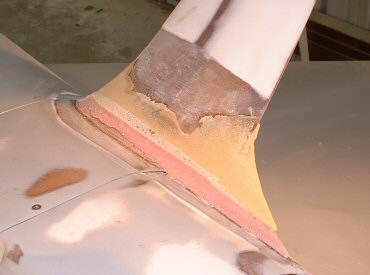
Step 3
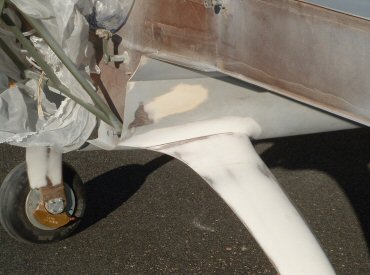
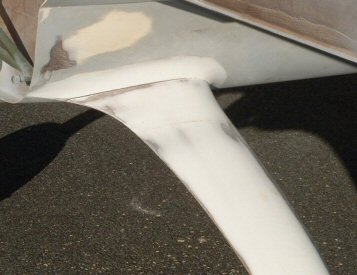
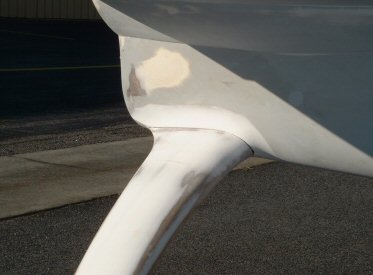
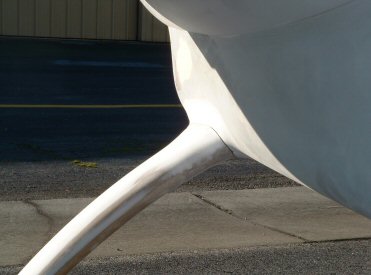
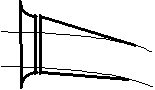
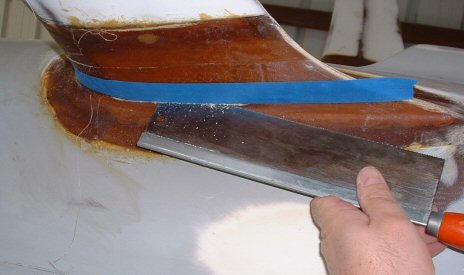
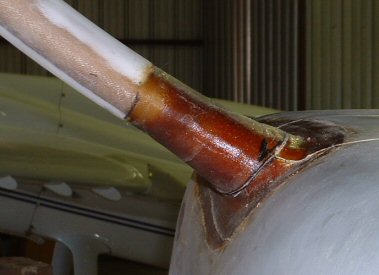
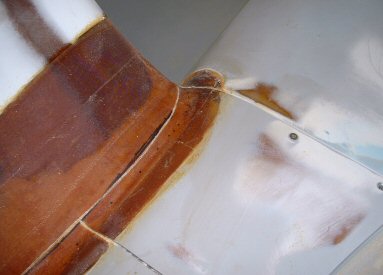
The slit gets cut where the brown foam meets the pink foam -- a half-inch from the fuselage. (I again gave myself some margin.) That was one of the reasons for using two different foam colors. I cut the slit using a razor saw. The tip of the saw is touching the gear leg, so if you use it like a depth gage you can see I have lots of clearance inside the cuff. Now, what about the main gear cover??? Well, you can see how the lines are cut here. It lifts off cleanly and the main gear can be removed easily. As you can see in the heads-on view, the whole affair is rather non-intrusive and aerodynamically clean.
The Final Product
Here are some crummy pictures of the final product. The gear fairings and the intersection fairings are more impressive than shown here.