Chapter 23: Cowl Surgery for Exhaust Pipe Opening
(In Work)
(updated 7/2/12)
The cowl openings for the exhaust pipes didn't line up with my pipes and the openings in the top cowl didn't line up with the openings in the bottom cowl. A double-whammy! No sense crying about spending good money on bad workmanship.
Here's how I fixed my cowl exhaust openings.
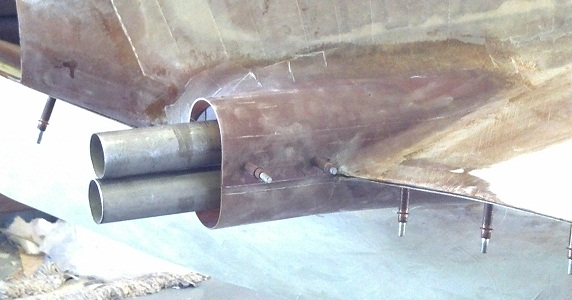
I hot-wired and glassed a foam plug that would fit over my exhaust pipes. I allowed for 3/4-inch clearance around the pipes. Next, I made a fitchecking tool from a piece of wood. I slid it over the pipes and trimmed away the cowl until I could slide the tool along the entire length of the pipes without touching the cowls (upper and lower). This was tedious work. I installed the plugs over the exhaust pipes. It was easier to install the plug as two pieces to get around the various brackets and hose clamps that I am using for my cooling system.


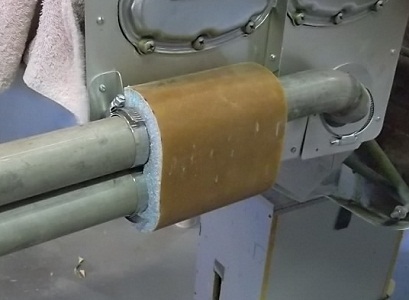
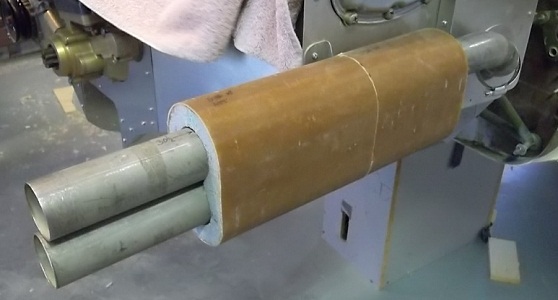
You can start to see the method to my madness in these pictures. I covered the plugs with duct tape for mold release. I used little stick wedges to ensure the plugs were aligned vertically on the pipes. With the top cowl in place, I faired the gaps with generous radiuses of bondo and micro. I sanded the bondo/micro nice and smooth. I glassed over the plugs with 2-BID with some overlap onto the surrounding cowl surfaces. Once cured, I popped the top cowl from the plugs and removed the top cowl from the airplane. I cleaned out the bondo and micro from inside the cowl. I rounded over all sharp edges and applied 2-BID on the inside.

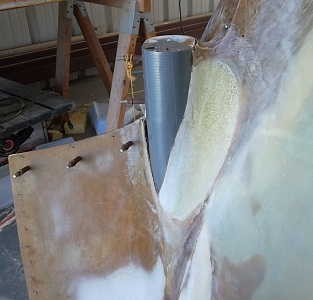
Fixing the openings on the bottom cowl proved way more problematic. Because of how AeroCad shaped the original exhaust troughs, there was no way to blend them to the plugs without having unsightly and draggy bumps. Gut-check time! As you can see in the photos below, I took my dremel tool and cut away large areas of the cowl. I filled the large holes with pour-foam, then shaped and blended the foam from cowl to plug. Since I can't carve/shape pour-foam worth crap, I ended up applying bondo and micro and reshaping the areas. I applied duct tape over the plugs and over the bondo and micro. I stood both cowls up on the ground and joined them together as they would be if they were on the plane. This made it easier to glass the openings. (Glassing upside down is never a pleasant experience.) I glassed over the plugs with 2-BID with some overlap onto the surrounding cowl surfaces. Once cured, I separated the lower cowl from the top cowl. I popped the plugs out and removed/cleaned out the pour-foam, bondo, and micro from the lower cowl. I rounded over all sharp edges and applied 2-BID on the inside.

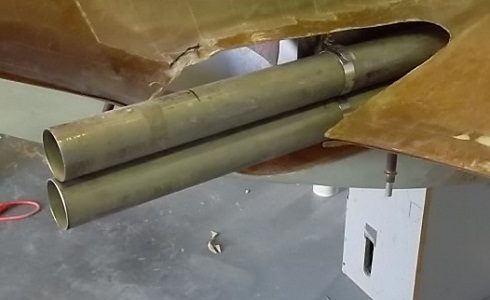
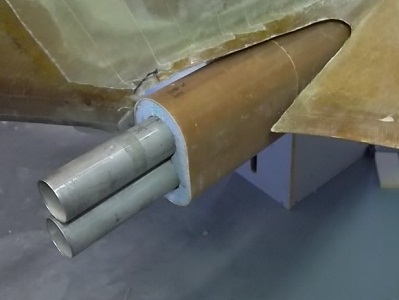
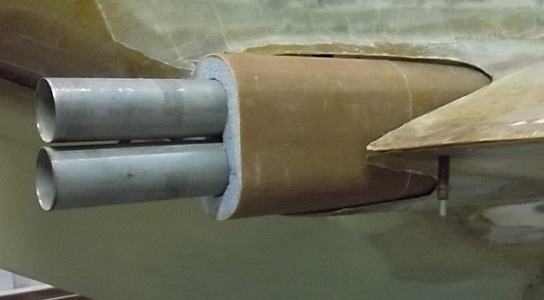
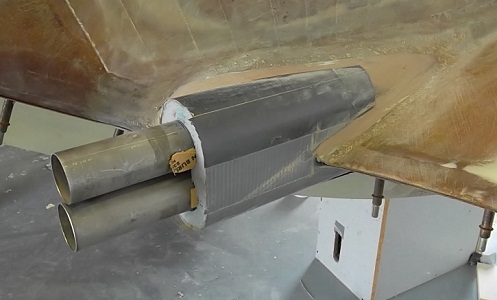
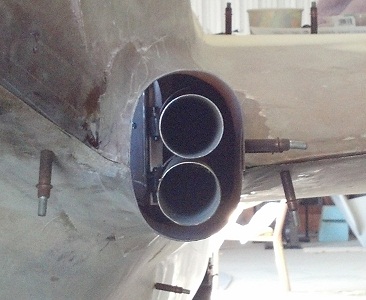
Here is the finished product. The mods turned out better than I could have imagined. Between the boat tail and the new exhaust port rework, I've modified about 75% of the lower cowl. :-) I might have been better off making my own. :-)


[Previous
][Home][Next]