Chapter 23: Cowl Surgery
(....this step is definitely NOT in the plans.)
Unexpected Surgery -- Top Cowl
When I fitted the cowls in 2003, the top cowl fit fine. Great, in fact. It was a tight fit, but it still provided the minimum half-inch clearances with the cylinders. With that, I removed the cowls and stored them on a shelf for a few years while I did the Chapter 25 contouring.
Now, fast forward to 2007. I am now installing the engine. I retrieve my cowls from storage and confidently slap them on the plane. What the heck??? The top cowl doesn't fit like it used to. The cheeks are too close to the corners of the aft cylinders. The left cheek is actually touching the aft cylinder. This is baffling to me (ha, ha..get it? "Baffling?") because I had a half-inch clearance around all cylinders when I fitted the cowls tin 2003. I know this because I covered the cylinders with half-inch spacers before fitting the cowl! It's been reported that cowls have a tendency to "curl up" and deform after they're made. But wow, that much? I rechecked the engine positioning. Maybe the engine was sitting up too high now. Nope, engine's in the same spot. So all I can come up with is the sneaky suspicion that the top cowl had curled up. (It's certainly the best EXCUSE I can come up with.)
Well, it is what it is. After sulking for a few days , I accepted that the only remedy was surgery to reshape the cowl cheeks. It's not as bad as it sounds, however. And it's much, much simpler and less involved than cutting up the cowl and grafting in new sections.
The process is straight-forward and simple:
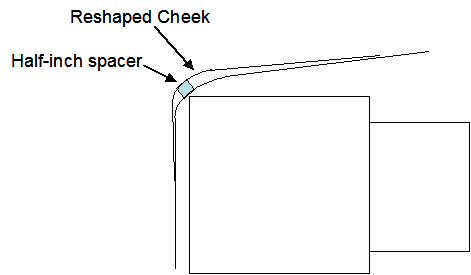
1. Glue a 1/2-inch tall witness strip onto the outside of the cowl cheeks. The witness strip will let me know when to stop sanding the pour foam.
2. Apply pour-foam over the cheek areas.
3. After cure, sand the pour-foam to reshape the cheek areas. STOP when I get down to the witness strip.
4. Cover the cheek areas with peel ply (for easy release later). Apply a 1- or 2-BID layup over the peel-ply and overlapping onto the existing cheek surfaces. Wait for cure.
5. Flip the cowl over and carefully cut away the old skin that's covered by the pour-foam. Dig out the pour-foam to expose the peel-ply. Remove the peel-ply to expose the new glass patch. Feather in the older surface with the new glass patch.
6. Apply an additional 4-5 BID from the inside to strengthen the patched area.
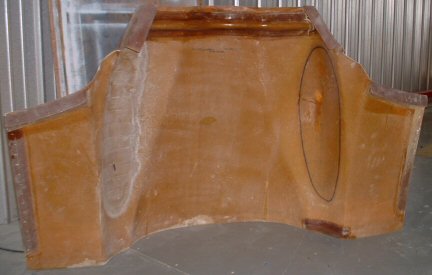
The drawing shows the concept. The first picture (the crappy one) shows the port cheek after reshaping it. You can see the blue foam I used as the witness strip. I didn't have any pour foam on the weekend I decided to do this. I didn't want to pay $100 for it at the boat store and I didn't want to wait for some to arrive from Aircraft Spruce. So I used bondo. WHAT A HUGE MISTAKE! It was PURE HELL removing all the bondo later. I resorted to using a grinder to get most of the bondo off, then switched to an orbital sander to remove the rest until I got within sight of the peel ply. Pulling up the peel ply removed the rest of it. I'll never do THAT again. The second picture shows the inside of the cowl. I've already removed the old glass and the bondo from the port cheek. After grinding out both cheeks, I installed the top cowl onto the airplane to verify adequate clearances before glassing the inside of the cheek areas. I had abundant clearances all the way around. Great! To finish the surgery, I set the cowl upside down on a set of saw horses and glassed the inside cheek areas. I used some boards to securely hold the cowl to shape while the glass cured. The last thing I wanted was the cowl taking a different shape than I wanted. I do not want to repeat this surgery!