Chapter 23: Some Prep Work
Prep Work
I decided to do some prep work before beginning Step 3. With my wings mounted to the spar, I have a mis-match between the aft edge of the spar and the top of the wing root. This was a conscious decision I made in Chapter 14 to ensure the spar wasn't thicker than the wing root. I sized down the spar a bit to avoid a big bump. In this manner, I avoid having to apply massive amounts of micro to the wing root to fare in the spar.
So I built up the top of the spar with foam and glass before making the cowling flanges. I cut and micro'd in some foam to fill the depression, and after cure, sanded the foam flush between the strakes and the wing root. I glassed 2-UND over the foam and overlapped it onto the wing root. Once cured, I used a straight edge and made a very straight cut between the spar and wing root. I did all this so that the cowl flanges on the aft spar would be located at the same height as the wing root flanges. This figure is a little exaggerated, but it illustrates the point.
More Prep Work
I share the hangar with a good friend Steve Volovsek, who is building a gorgeous Long-EZ. Our hangar is at the end of the row, so we actually have a "hangar and half". We call the normal sized T-hangar the "high bay". We use it whenever one of us works on the plane with the wings attached. The half unit is called the "low bay". It's the perfect size for working on the fuselage, but there isn't any room for attaching the wings.
Up until now, our build schedules have been mutually compatible. We've been quite happy with me in the high bay and him in the low bay. The plan was for me to install my engine in January 2003, finish installing the cowls by May 2003, then switch bays with Steve so he could finish his cowl installations. But due to the unexpected 5-month delay in receiving my engine mount, our build schedules converged such that we both need the high bay...now! Steve's been very patient with me, and since no two points can occupy the same space, I decided to give up the high bay to him.
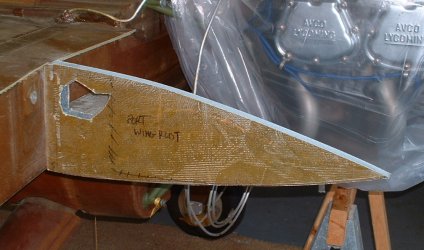
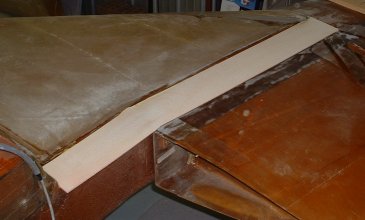
Per the plans, the cowls are best fitted with the wings attached. If you are hurting for room, Nat suggests an alternative method of attaching some fake wing roots to the aft side of the center spar. So that's what I did. I took some spare foam and glassed both sides. I rolled the fuselage outside and attached the wings. I held the foam against the aft wing roots and marked out the profiles. I cut and trimmed these fake wing roots until they matched the real wing roots. I also cut out some braces. I removed the wings and rolled the fuselage back into the low bay.
As you can see in the picture below, I have enough room for the starboard wing, so I only had to attach the port wing's fake wing root and its brace to the center spar. (I should let you "discover" this for yourself, but that big hole in the fake wing root is so you have access to the wing bolt so you can remove the wing!) After I've fabricated the top cowl flanges on the starboard side, I'll reorient the plane and swap sides. I'll attach the port wing, glue on the starboard wing's fake wing root, and fabricate the cowl flanges on the port side.