Chapter 18: Inside Canopy Frame
Step 12: Carving the Inside Foam
I broke the canopy deck free from the fuselage without too much trouble. It helped to first run a hacksaw blade around the perimeter of the glassed layups just to break the adhesion between the layups and the duct tape.
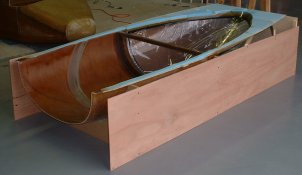
I next built the jig over the outside of the canopy. For reasons all my own, the jig extends over the entire canopy as I have not yet cut the aft canopy away from the forward canopy. I used 1/8th inch plywood and two of the J-frames from the turtleback jig. It looks massive, but it is actually l-i-g-h-t. The plywood sides eliminate the sag you can get with the plans-suggested jig. If you don't know the story, many builders have found that when jigged upside down, the canopy will sag. Thus after cure, the canopy will only touch the upper longerons at the corners, leaving gaps over the longerons.

Step 13: Hardware Reinforcements and Inside Skin
I started carving the inside deck foam, but stopped when I realized it would be easier to make the hardpoints first. I also found that my hinges required a 3/16th-inch recess instead of the 1/8th-inch recess called for in the plans.
Instead of trying to get cute with carving the inside deck foam, I took my four-foot spline sander and sanded down most of the deck in the fore-aft direction to within 3 inches of the outer edges of the deck. I then used a 9-inch length of 2-inch PVC pipe wrapped with a sheet of sandpaper to carve the curves. By spline sanding fore and aft, the foam is taken down to the shape determined by the curvature of the forward, glassed edge (outer skin) and the edge of the glass bubble. Then it is a simple matter to sand away the material with the PVC pipe to form the curves between the flat part of the inside deck and the 1.6 to 2 inches left around the perimeter of the canopy deck. As for glassing the inside canopy deck...same girl, different dress. I made another paper template, traced it to my strake table, and wet out the layups. I applied the 2-BID layups first (port and starboard halves), then applied the 2-UND layups. I dabbed on a little extra epoxy around the flox edges and over the hardpoints.