|
|






Main Landing Gear Bow |
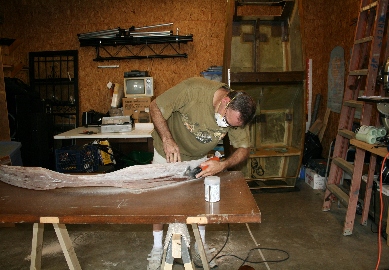
I asked a friend of mine if I could borrow his belt sander to do the task of sanding the Main Bow. He said sure...as soon as I find it! The next day, instead of looking for it, he left for Florida!!! Go figure!!! Anyway, I opted to use my Fein Multimaster to perform this task. It worked out OK, but I think it would have gone much quicker with the belt sander. Just wait till my "Buddy" asks to go flying in my Mark IV; I'll say sure...when I get back from Florida!!! Anyway, to the right is a picture of me taking my time to make sure all the "shiney stuff" was off. |
In an effort to save space in my shop, I use solid core doors as work tops. When not in use, they stand up nicely in the corner. Here you see the main gear bow mounted on 4" long screws which are screwed directly into the door. The bow is secured with 5 minute epoxy mixed with flox, and ready for the first plies of uni for the torsional reinforcement layups. |
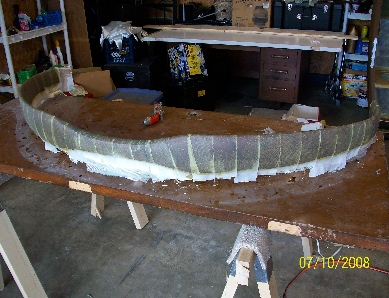
Here you see the main gear bow after the first 4 ply lay up. Someone really should make a demonstation video on the proper way to do this part of the chapter. If you don't really think about what the plans are telling you, it's easy to misinterpret. I originally thought the lay ups wrapped around the strut much like you would apply an "Ace" bandage. With a little research, I was able to figure out that the lengths of uni lay down the length of the strut. DUH!!! |
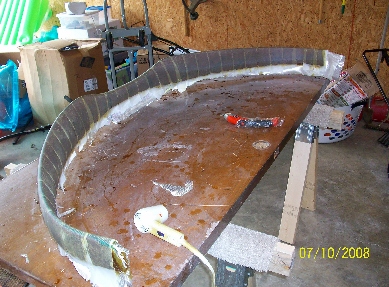
Here's another shot. This time of the inside of the strut. Notice that I have not removed the peel ply yet. |
I'm using EZ Poxy on this project and it requires the use of a hair dryer to get the glass fully wet out. It also has some amazing corrosive properties. My dryer gave up the ghost half way through the third ply of this four ply lay up. I was forced to get a portable heater from my attic and apply the heat directly to the area I was stippling. What a chore that was. All in all, it was an good lay up and only took me 2 1/2 hours to complete. Click on the image to the right to see how dramatic the corrosive powers of this epoxy really is. And now you know why it is advisible to take every safety precaution you can when working with this stuff. |
I felt the need to purchase a small soft drink at McDonalds when I went in to steal a handfull of straws to use for my brake line conduits. Here you see them in place. I used 5 minute epoxy and duct tape to hold them in place while the epoxy cured. |
I thought I was going to be fancy, and use some light weight aluminum strips as the guide for the 2 ply bid lay up that follows, but it was quite apparent from the start that it wasn't going to work well. I eventually resorted to the plans method of using aluminum tape. Quess what? I works out better than what I wanted to try. Anyway, here you see the aluminum tape in place and ready for the lay up. Laying on the table in the foreground are the aluminum strips I originally wanted to use. |
The last 4 ply torsional lay up requires a bit more clearance above the work table due to the break line conduits that were installed in the previous step. I used pieces of 2x4 standing on the 2" side and bondoed to the table. I then used the same 4" screws I previously used for supporting the strut. I must admit here that I saw this on Marc Zeitlin's website and thought it a pretty good idea....soooo I borrowed it! Thanks, Marc!! |
Here's another shot that shows the amount of clearance I had for this final torsional lay up |
OK! Time for true confessions. I like to consider myself an intelligent man, and I always read, and re-read everything pertaining to the plans. I never do a thing until I'm confident that I have a thourough understanding of what the plans would have me do. With that being said, the picture to the right is the result of my first attempt at making the attach tab lay up jig box. I'm still not quite sure what happened. I measured and calculated three and four times. I put the thing together, and when I set it on the strut expecting a "Perfect Fit", I was dumb-founded to see that it just wasn't going to work as is. Oh well, "When at first you don't succeed...." |
Finally, success!! I'm pleased with the way this jig box turned out. It actually took two or three attempts (OK, four!!), to get it right. Still don't really know what I was doing wrong, but the result is quite good. |
I used small dabs of 5 minute epoxy to secure the box to the strut. I did this because my bondo wants to set up EXTREMELY fast. (within a matter of a few seconds after mixing it up) Here you see another shot of the jig box in place. I have it clamped to the piece of plywood that is used to help with alignment while the 5 minute epoxy cures. |
The next step will be updated soon! |